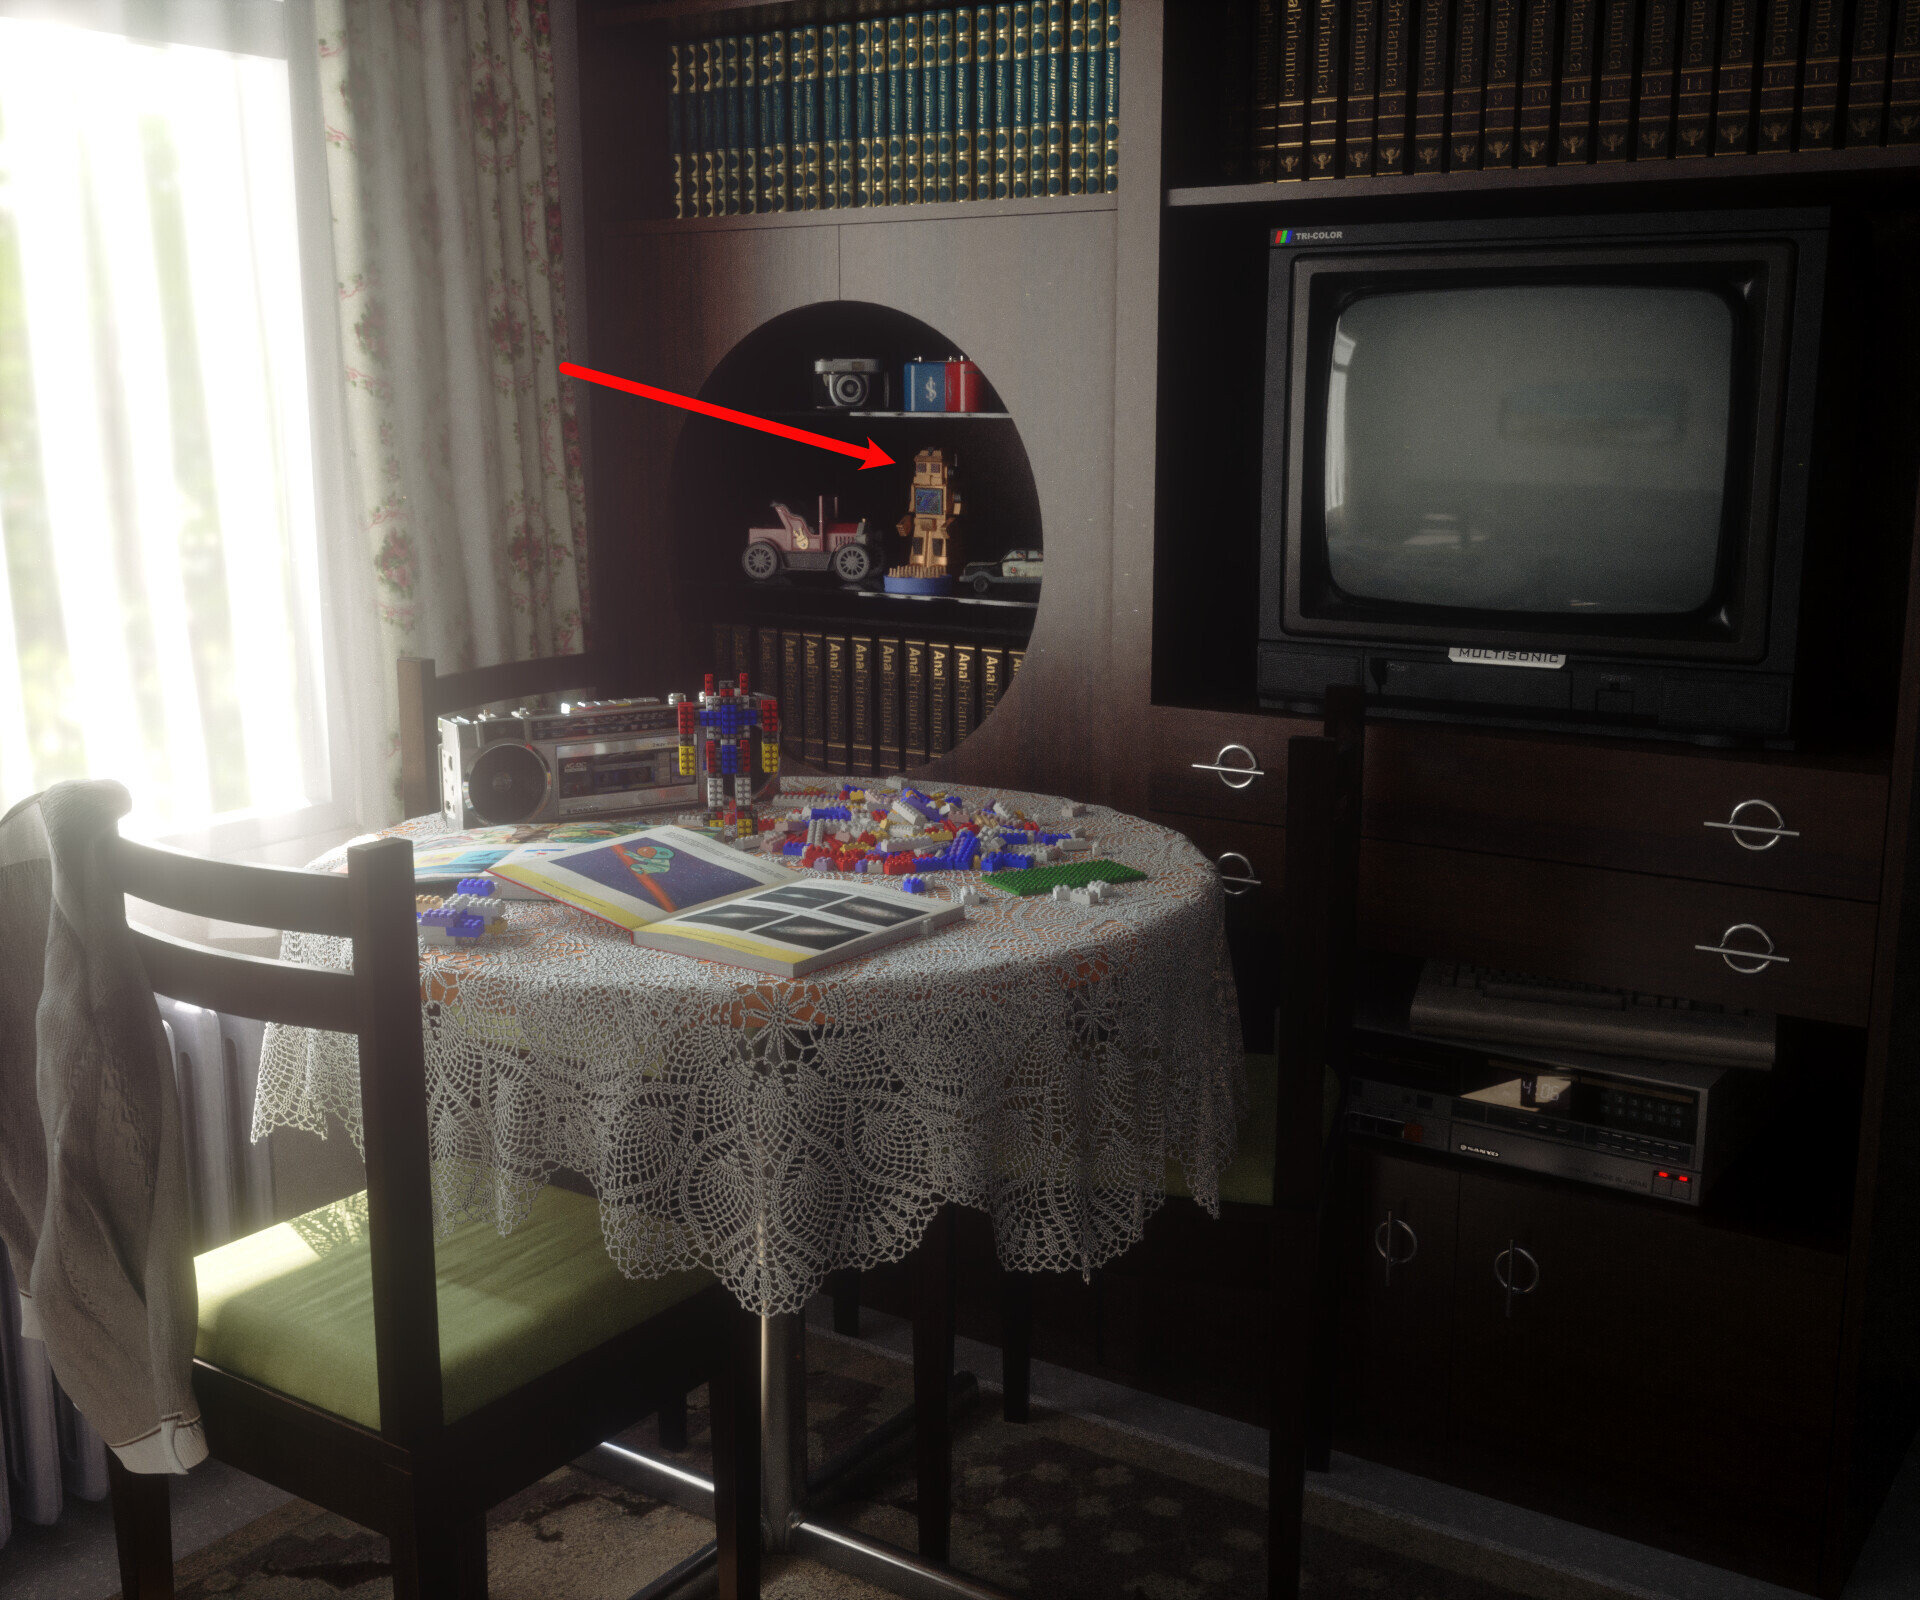
Hello everyone! I made an attempt to repair an old robot toy from my childhood. Actually this robot was owned by my little brother.
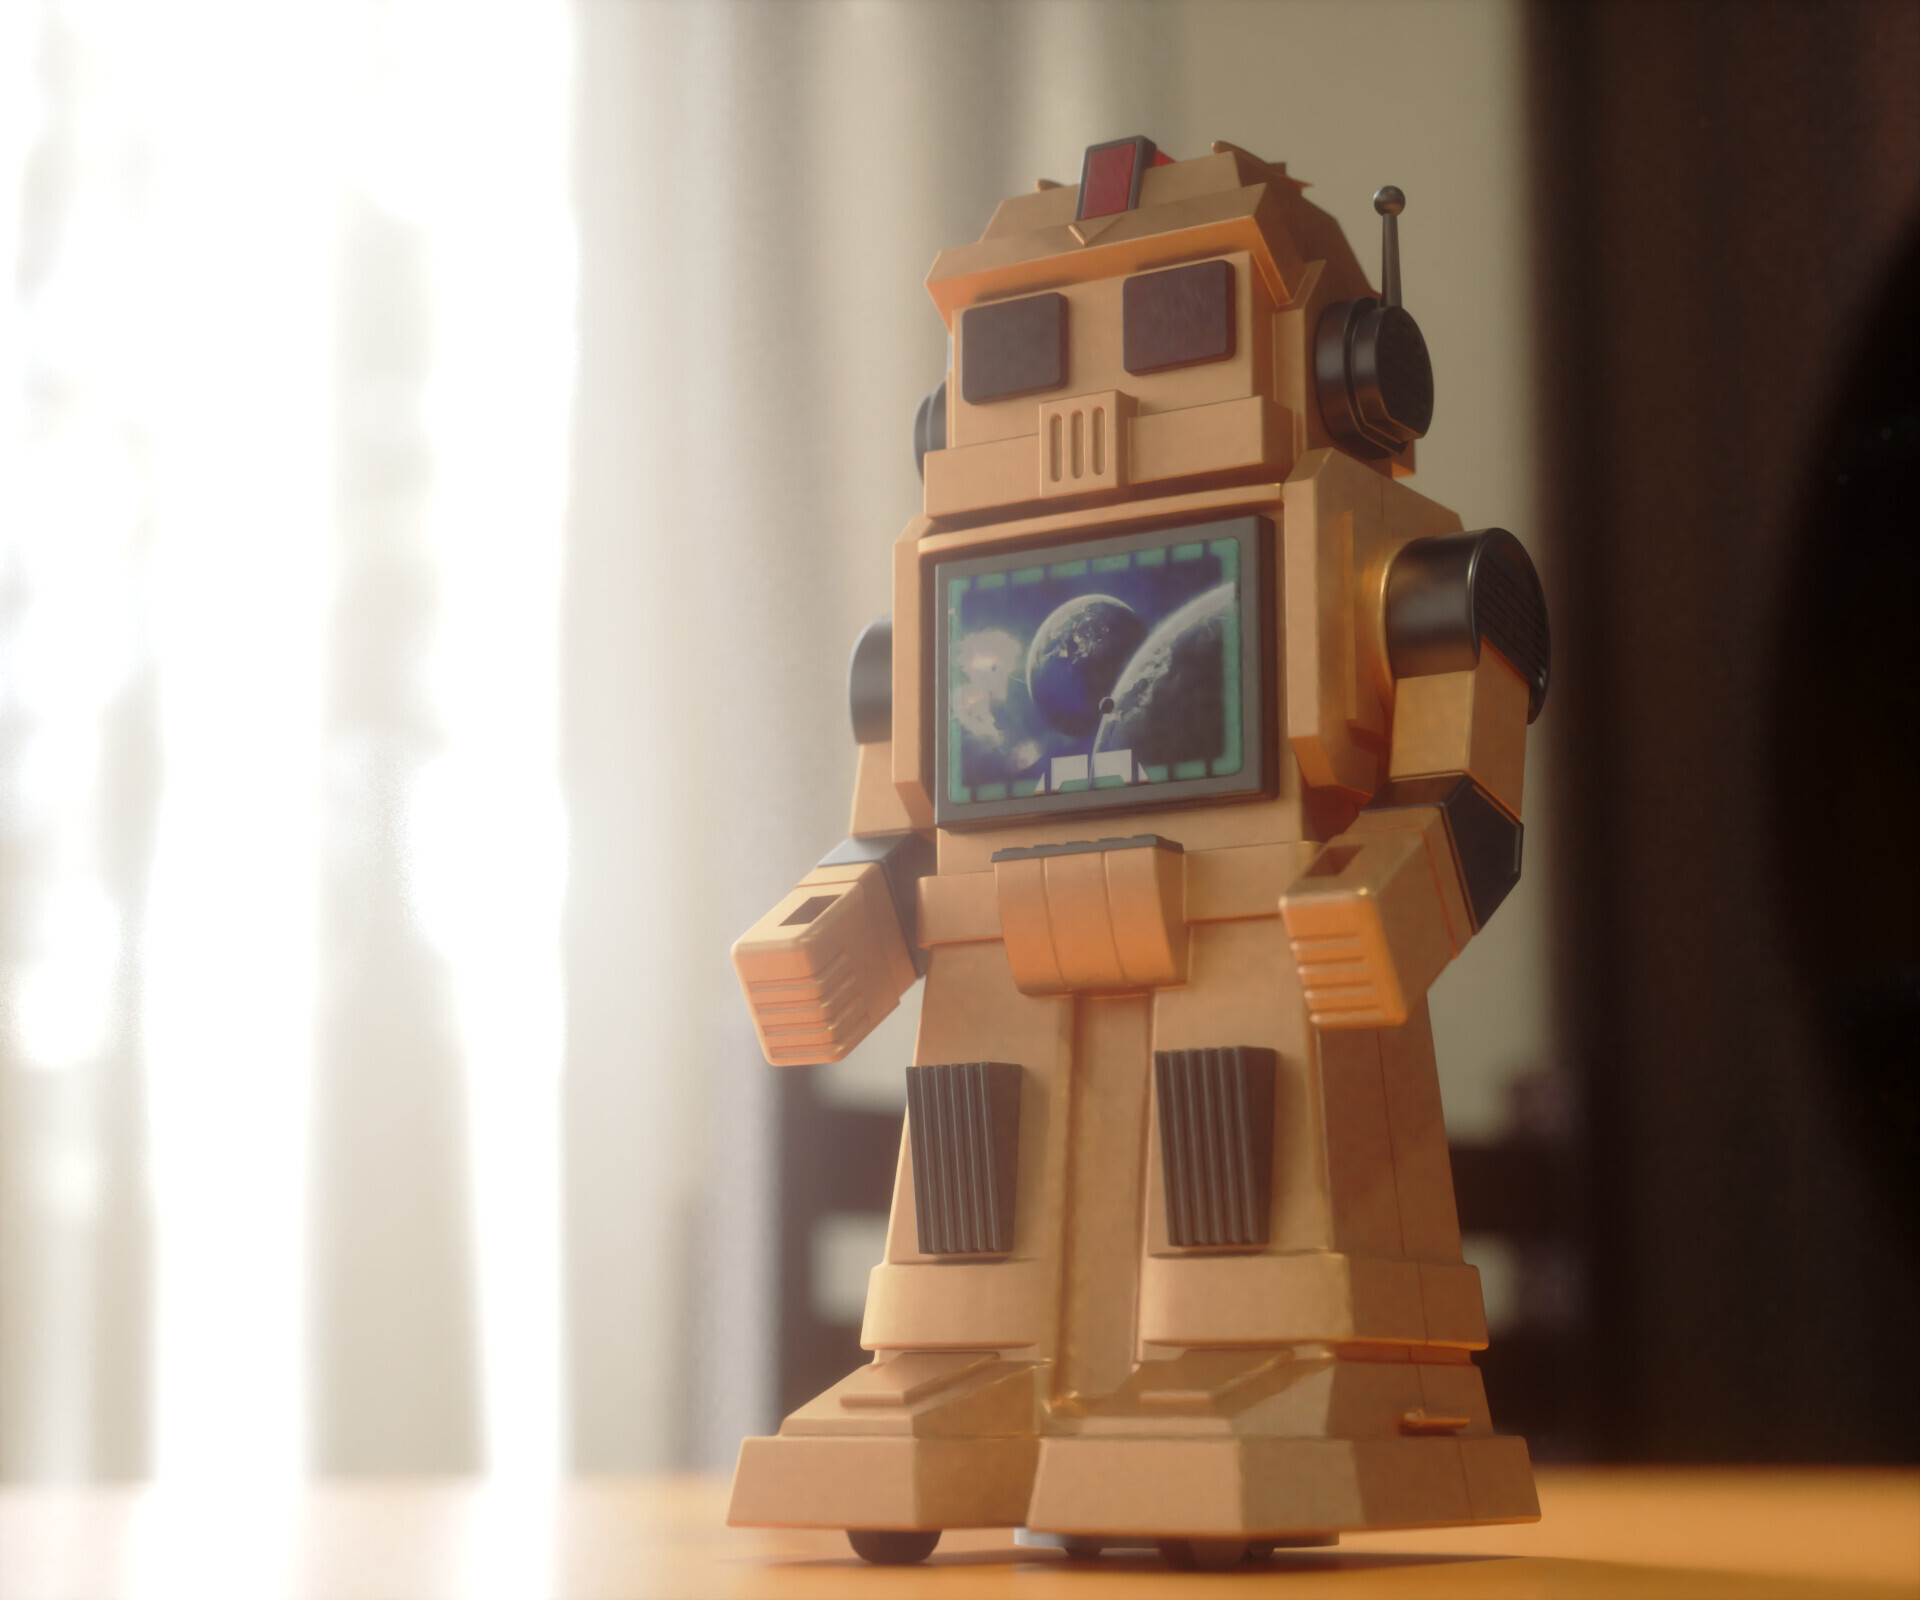
You may remember this robot from one of my artworks named "a Scene from 90s". When I was creating that scene about 3 years ago, I couldn't be able to get my hands to this toy, so I created the 3d model by finding photos of the toy from internet, instead of modeling it by correct measurements. I made enough similarity at least.
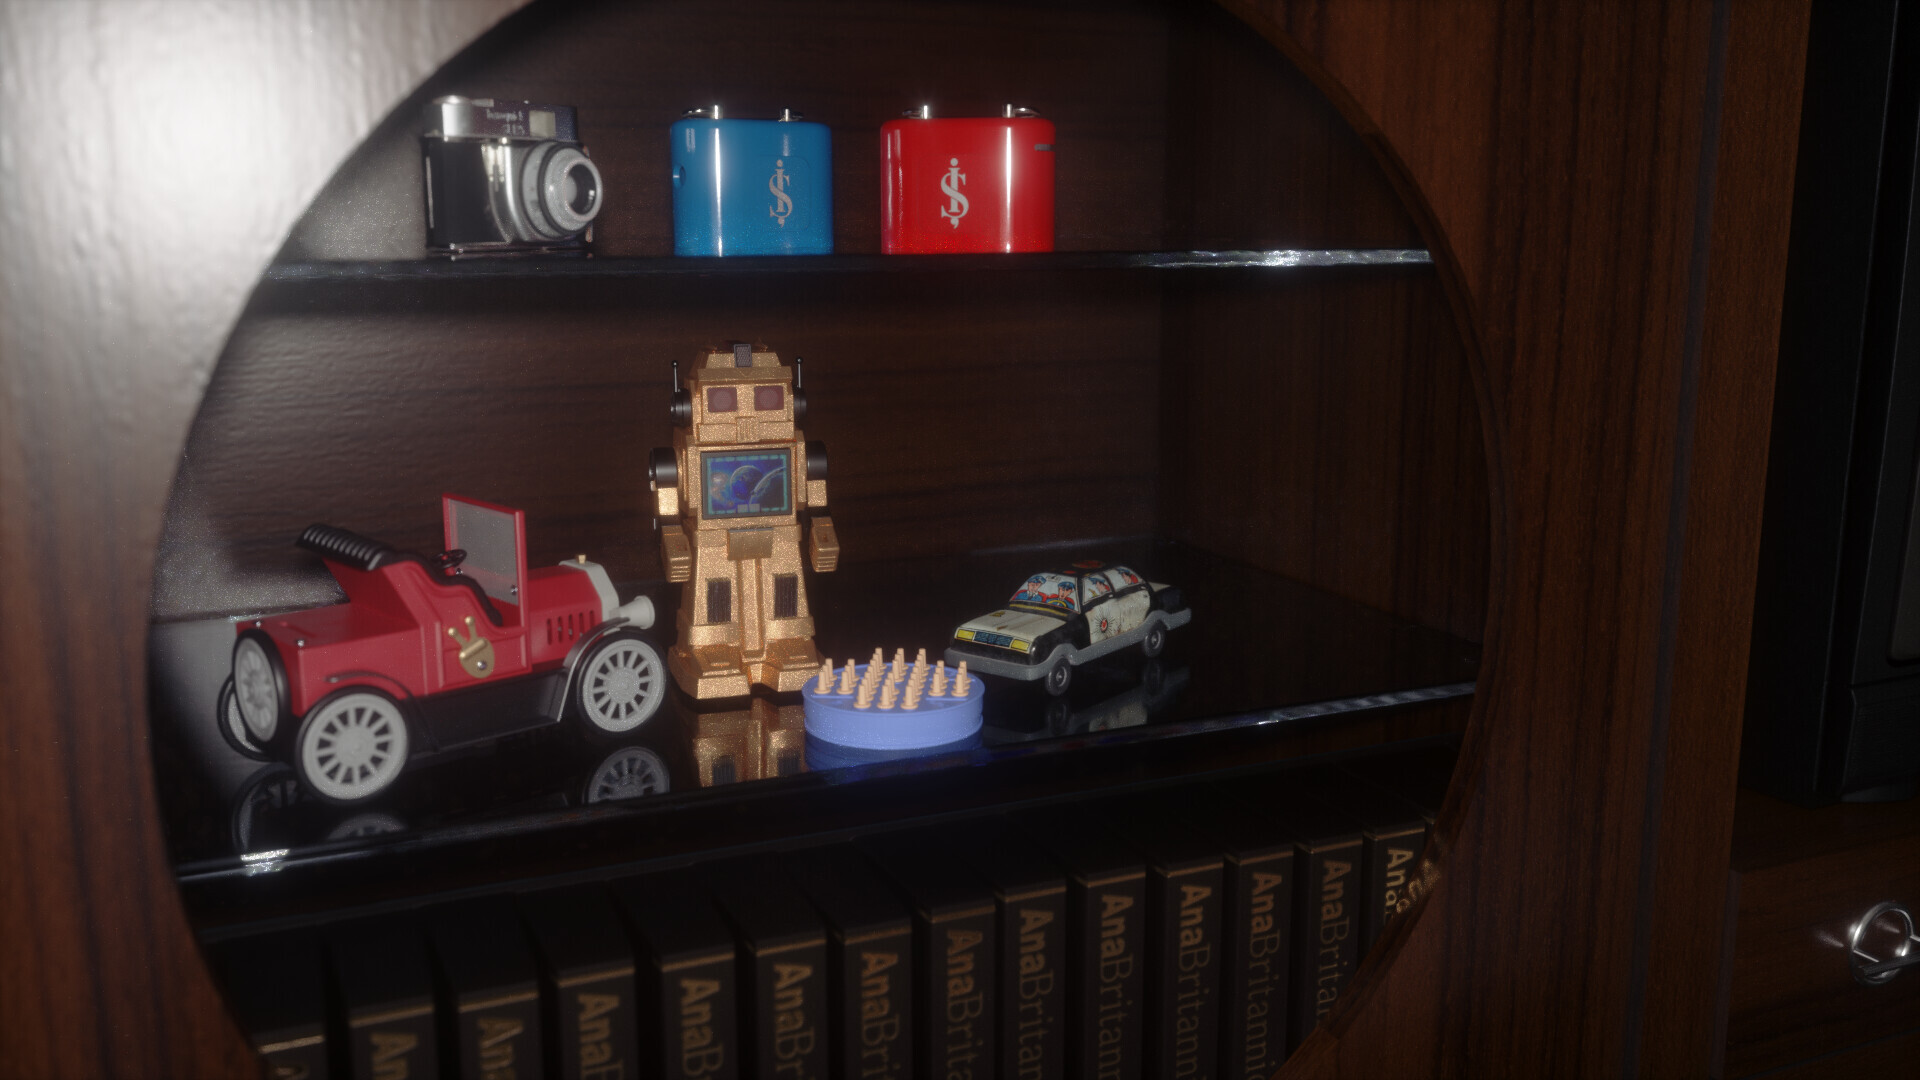
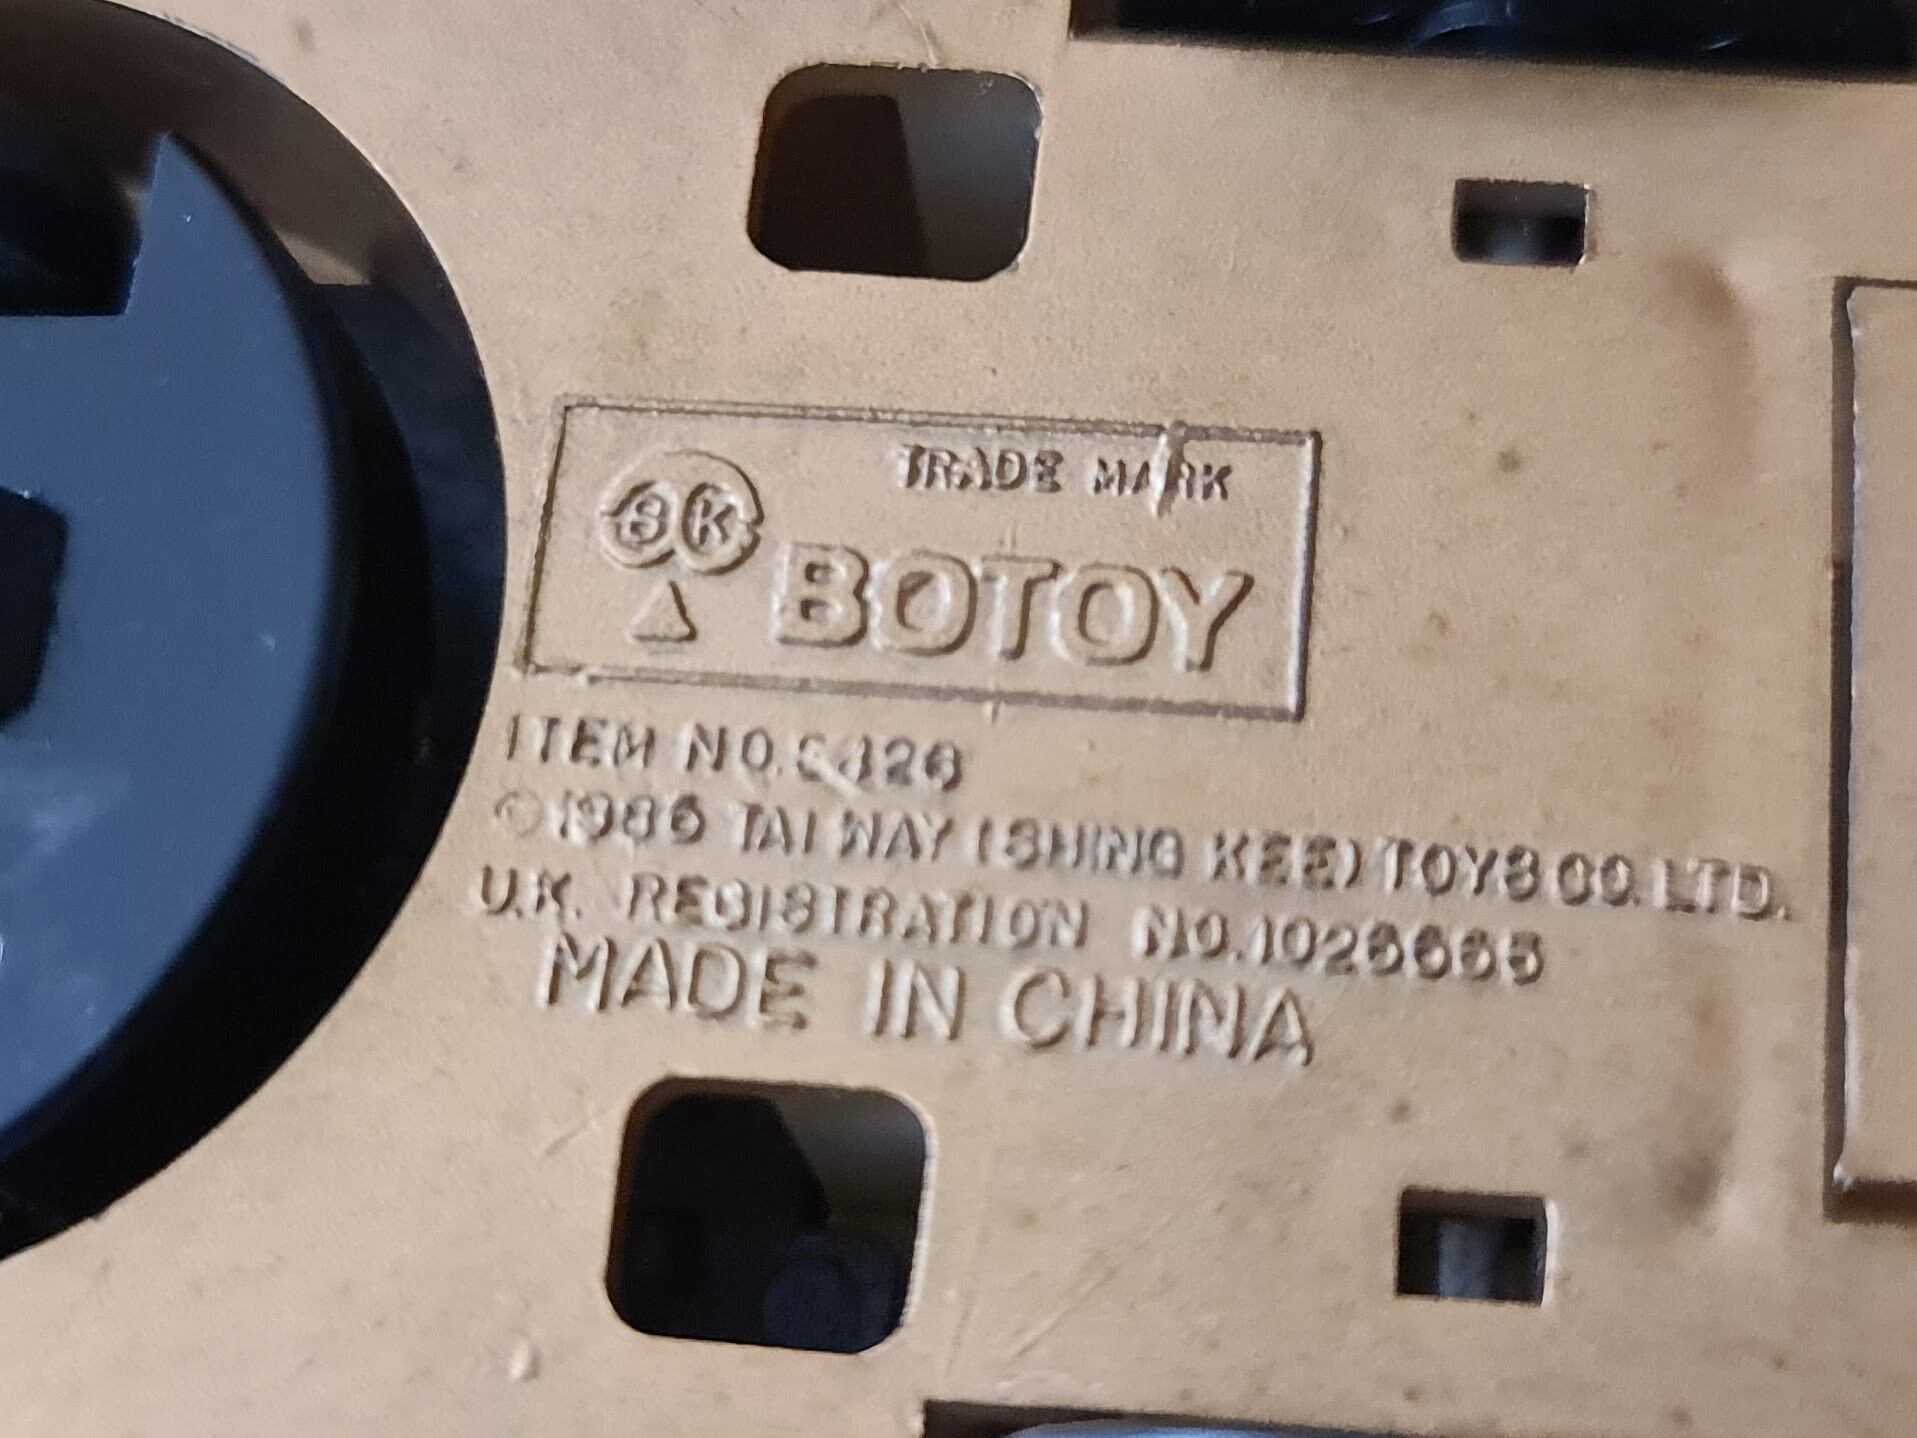
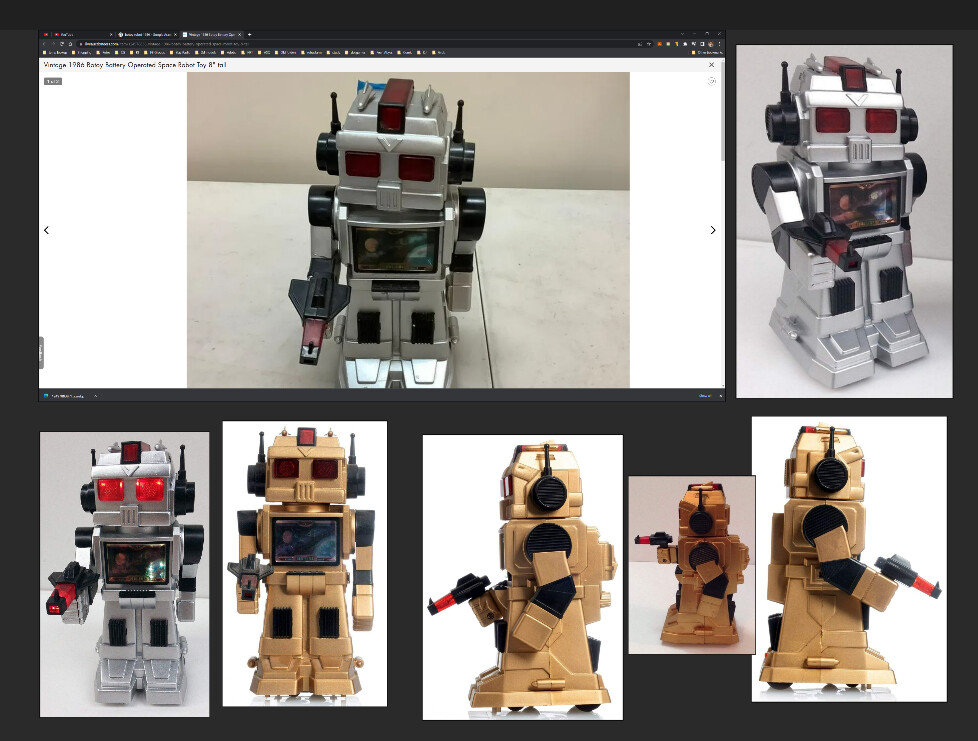
Anyway, toy is manifactured by Taiway (Shing Kee) Toys Co. Ltd. from China in 1986. It's called "Botoy".
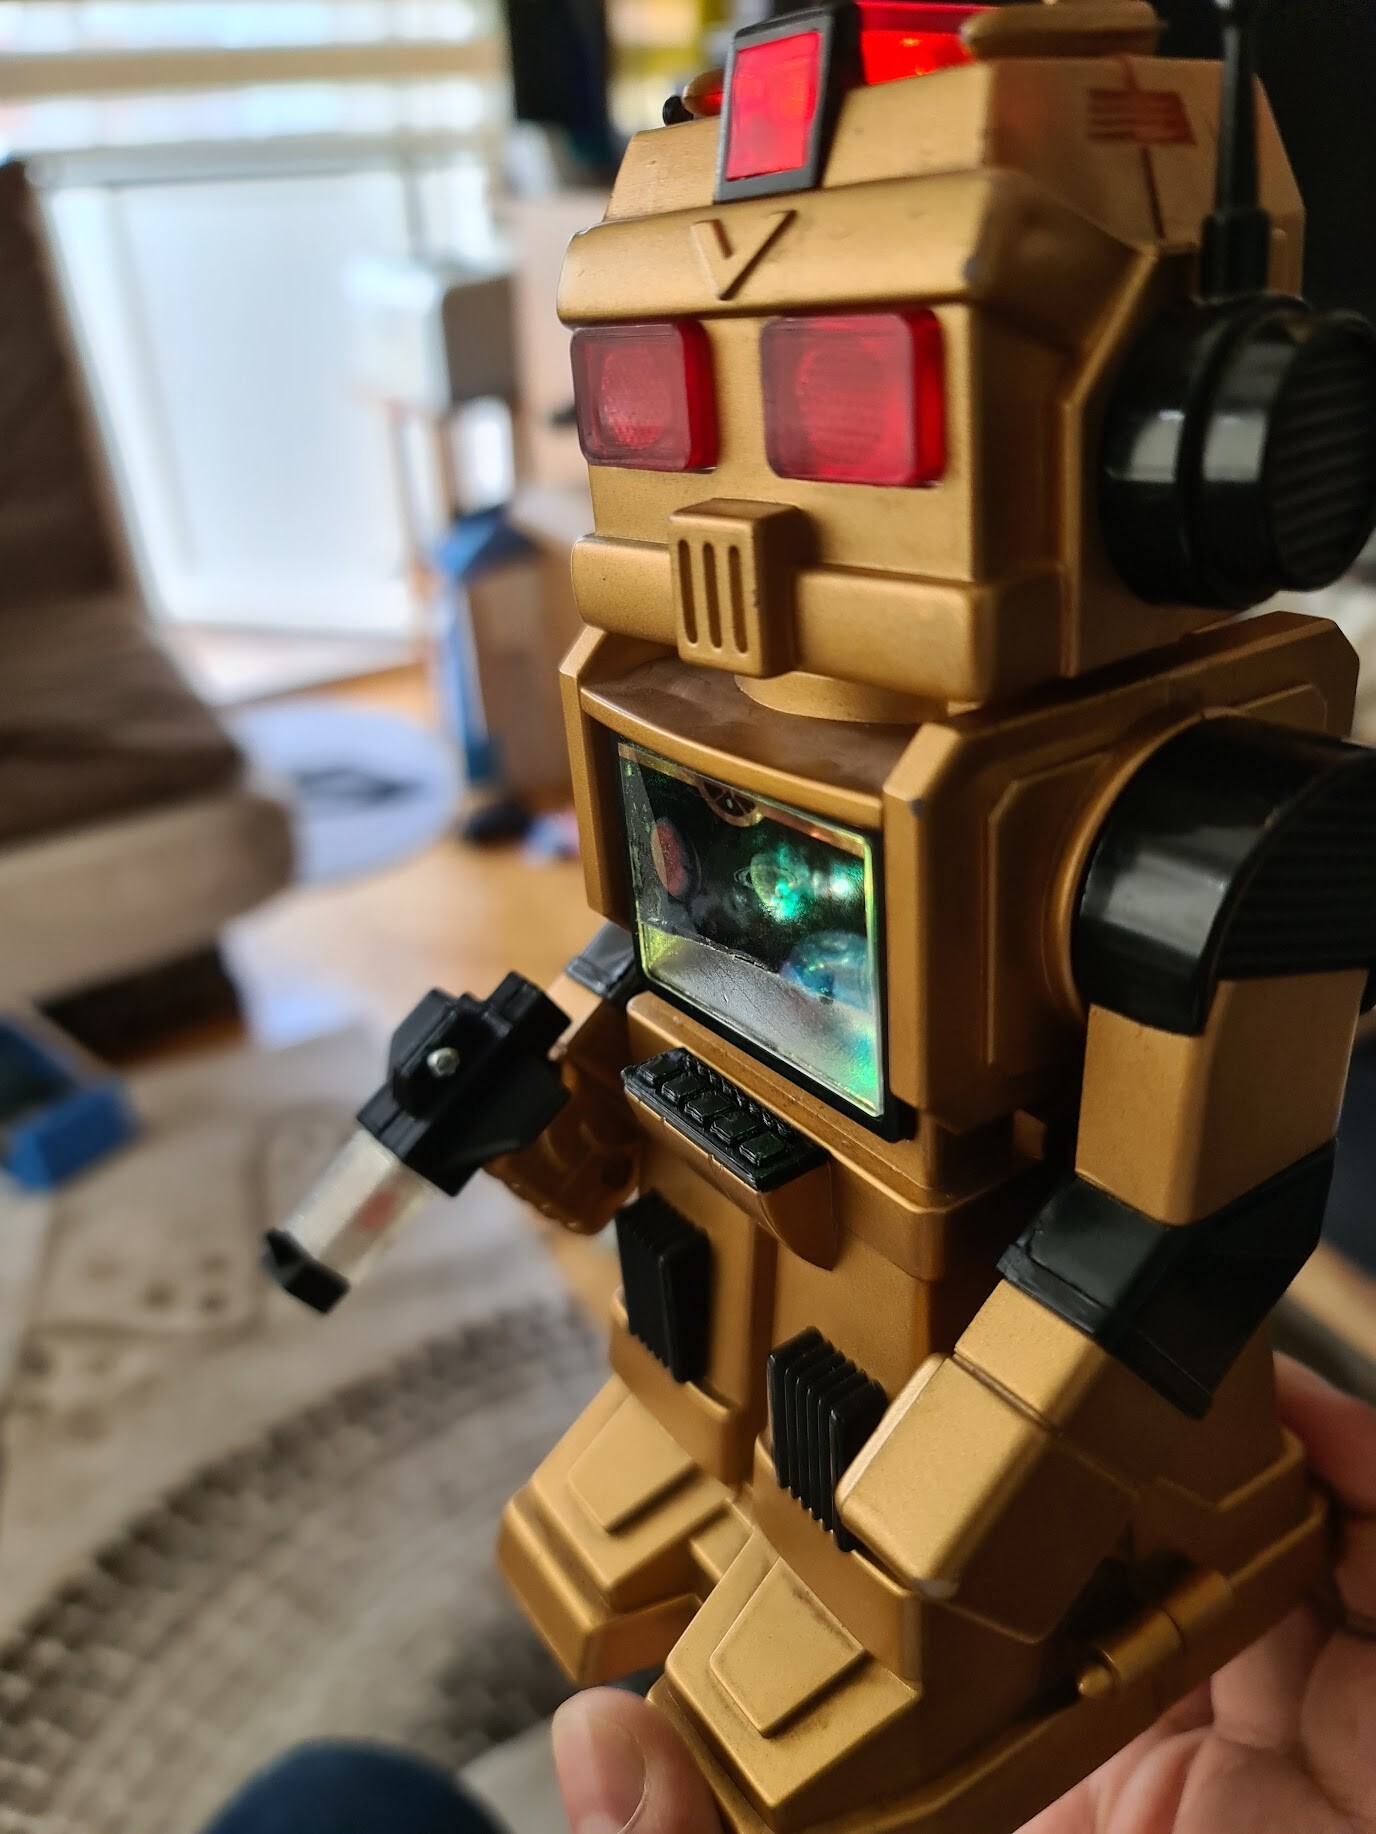
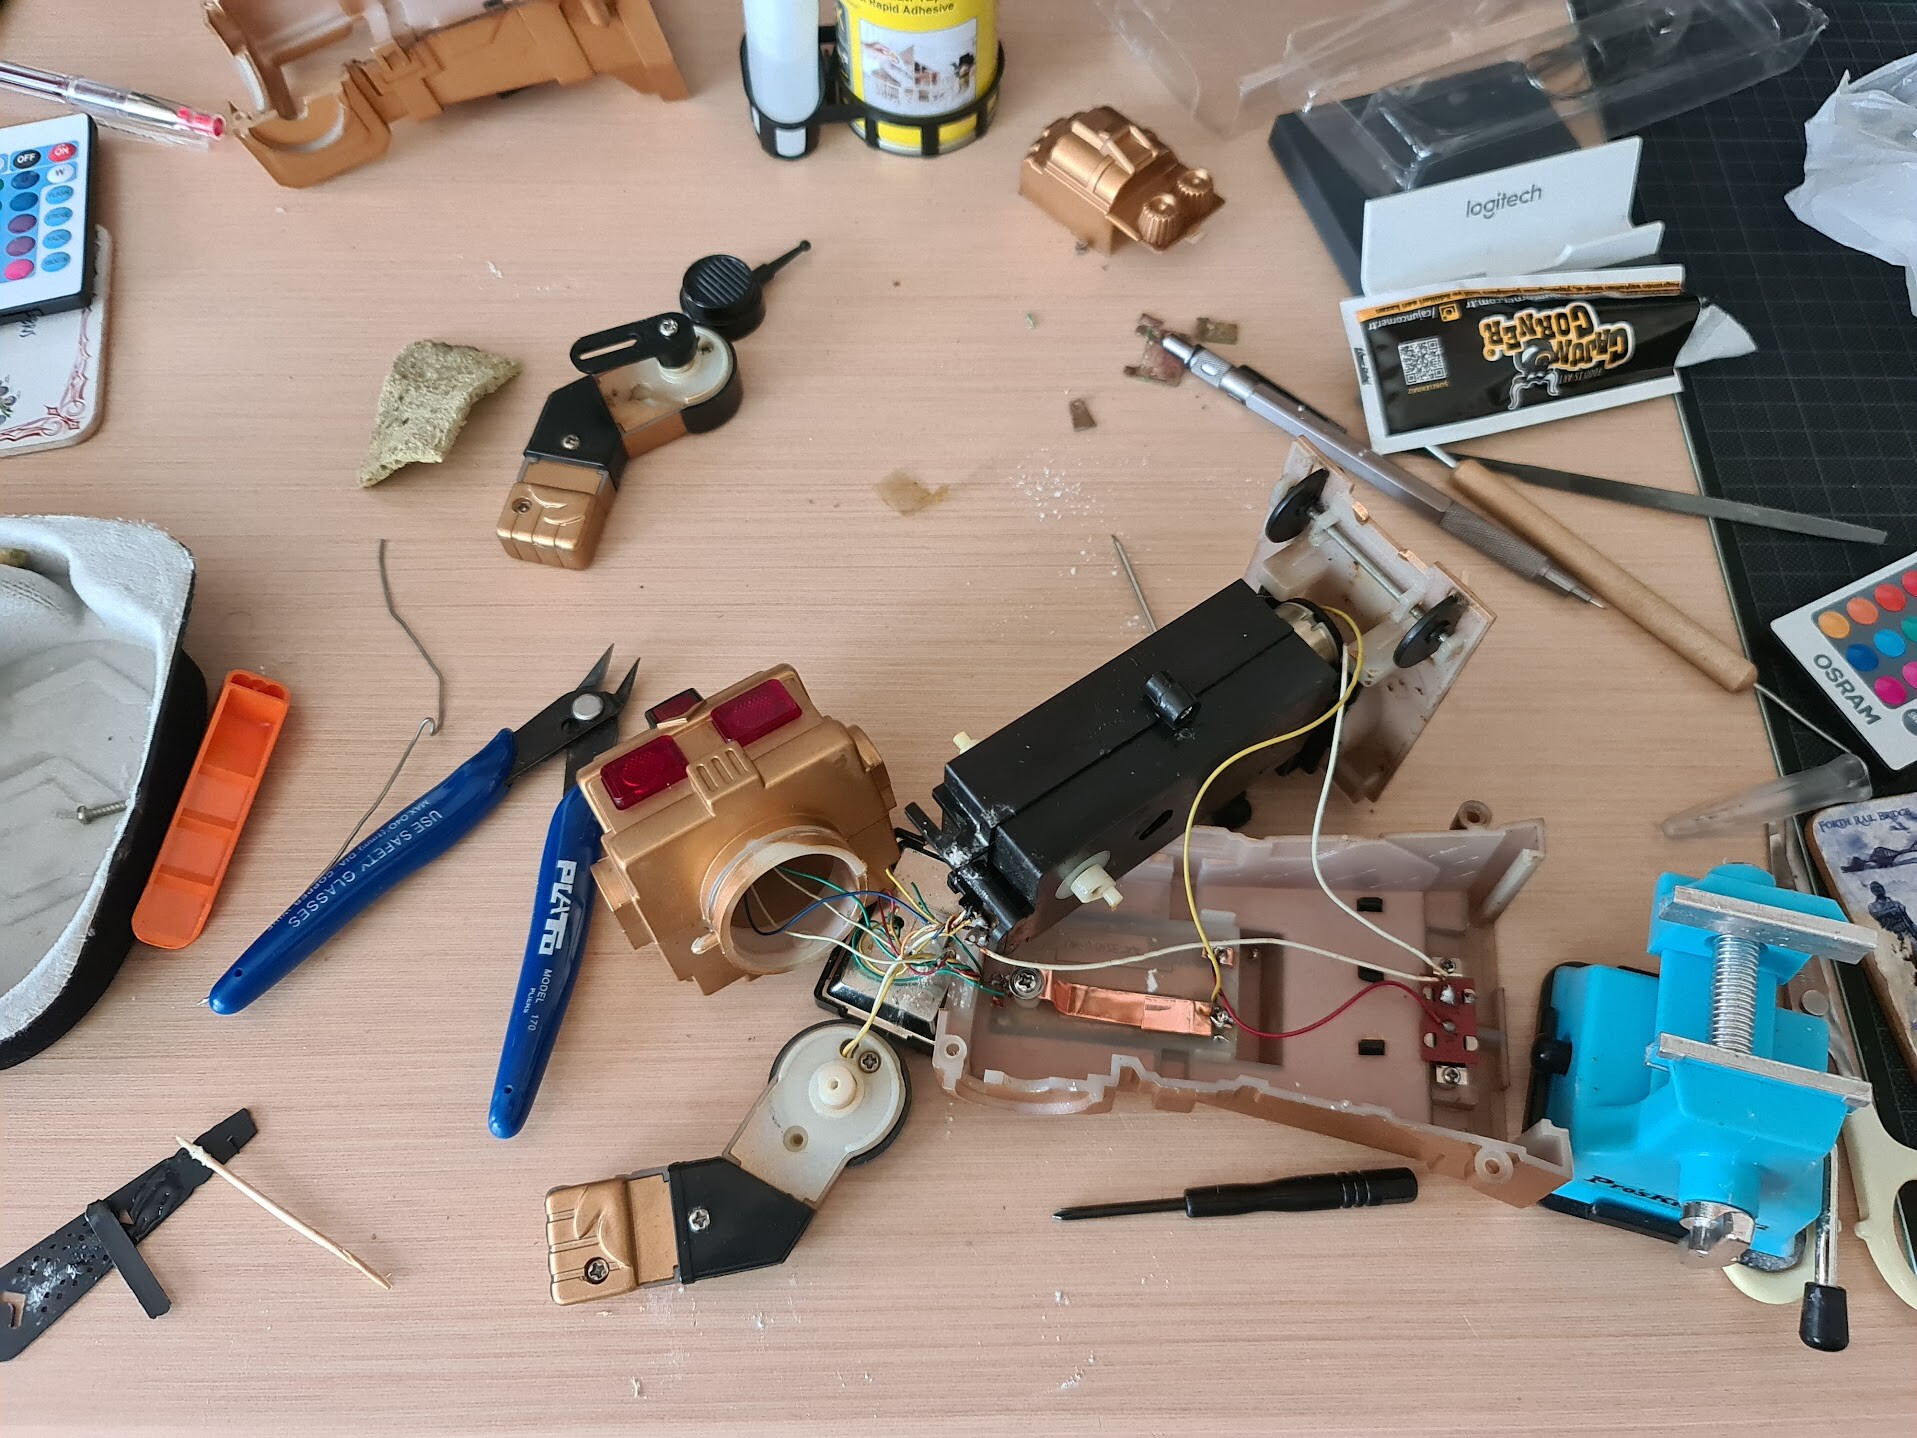
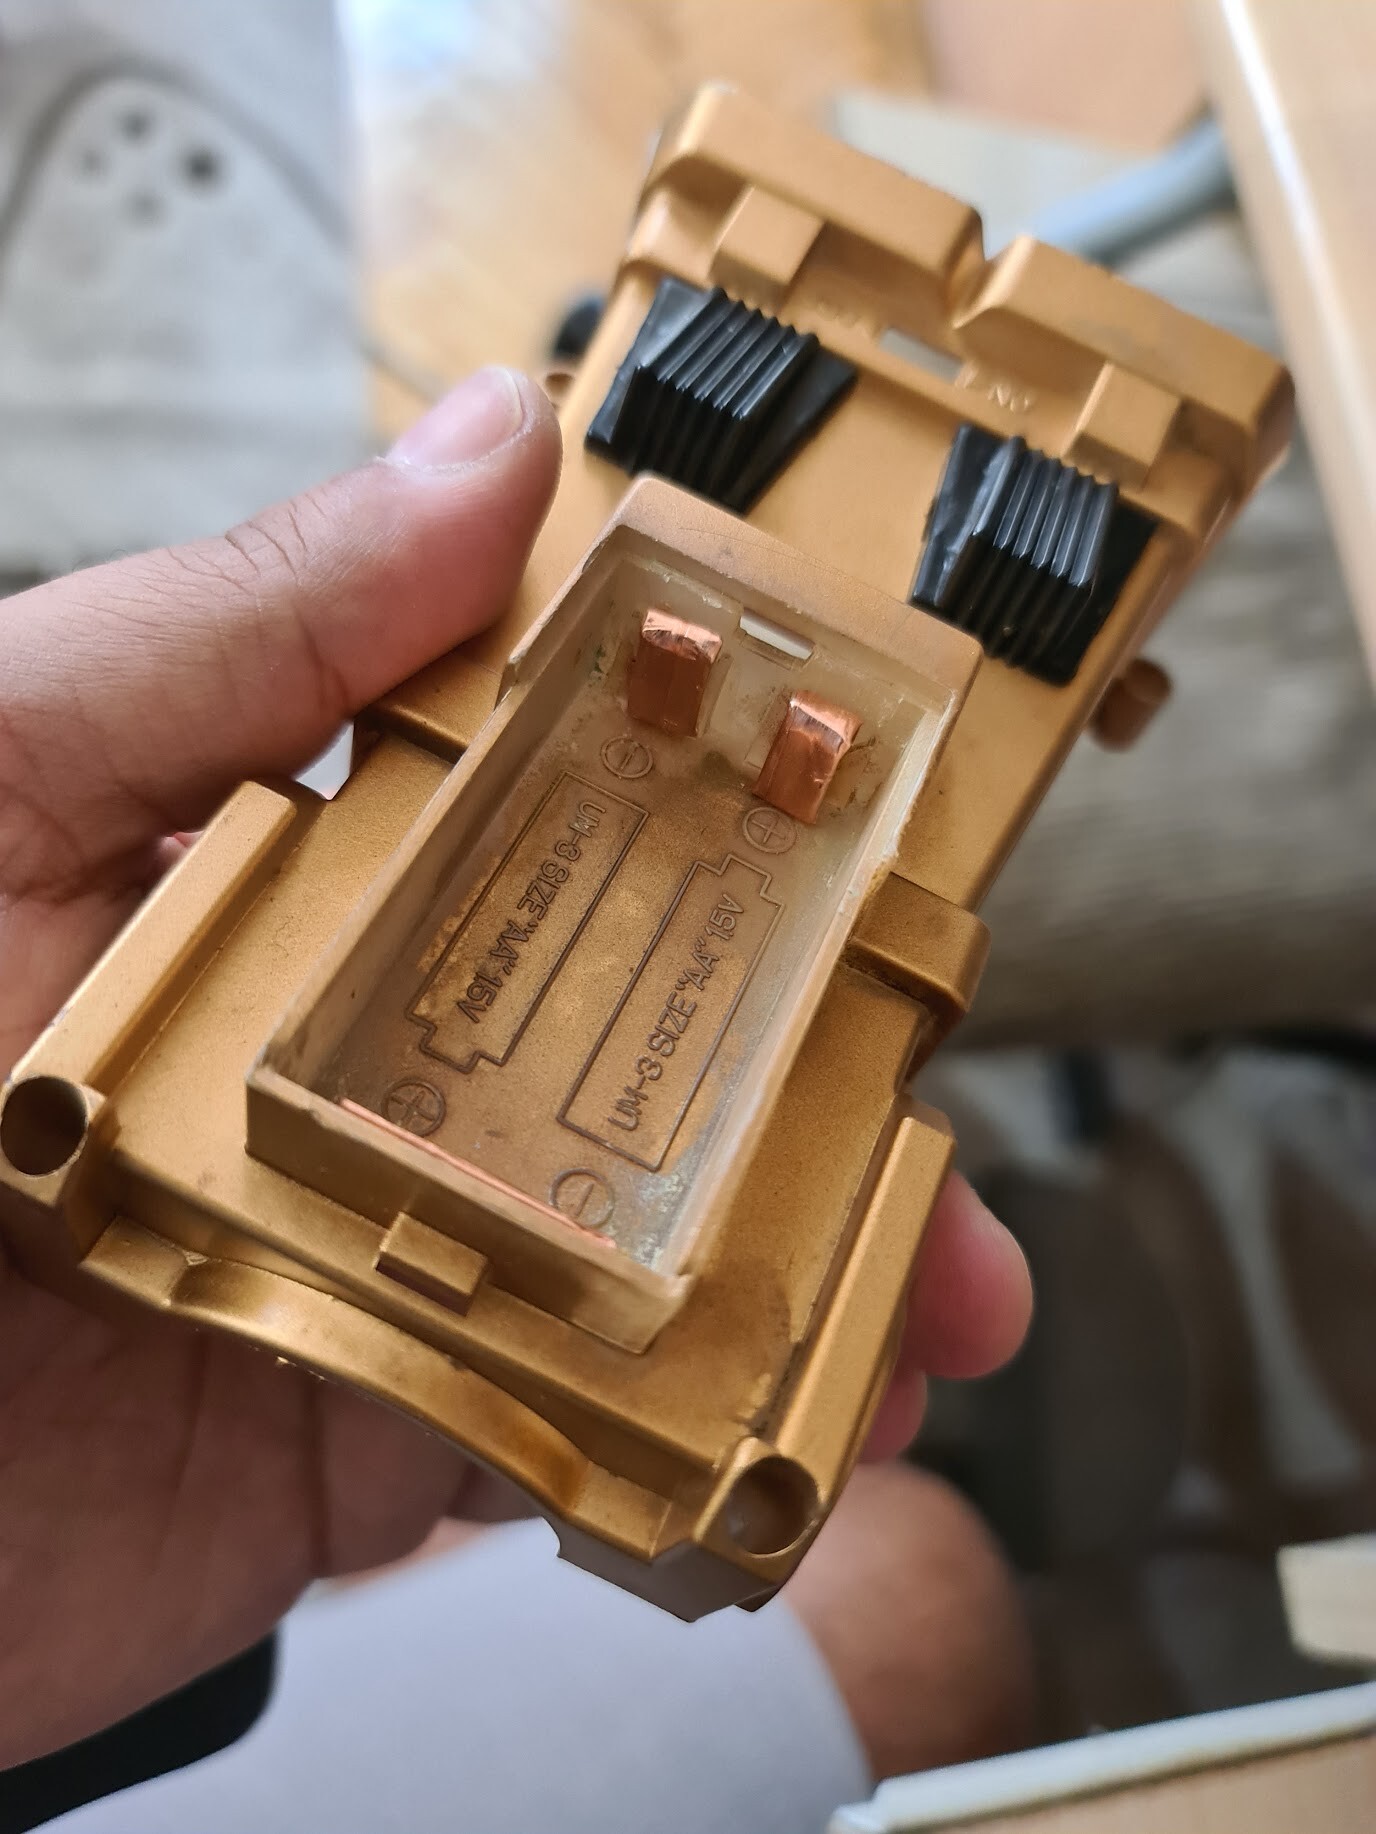
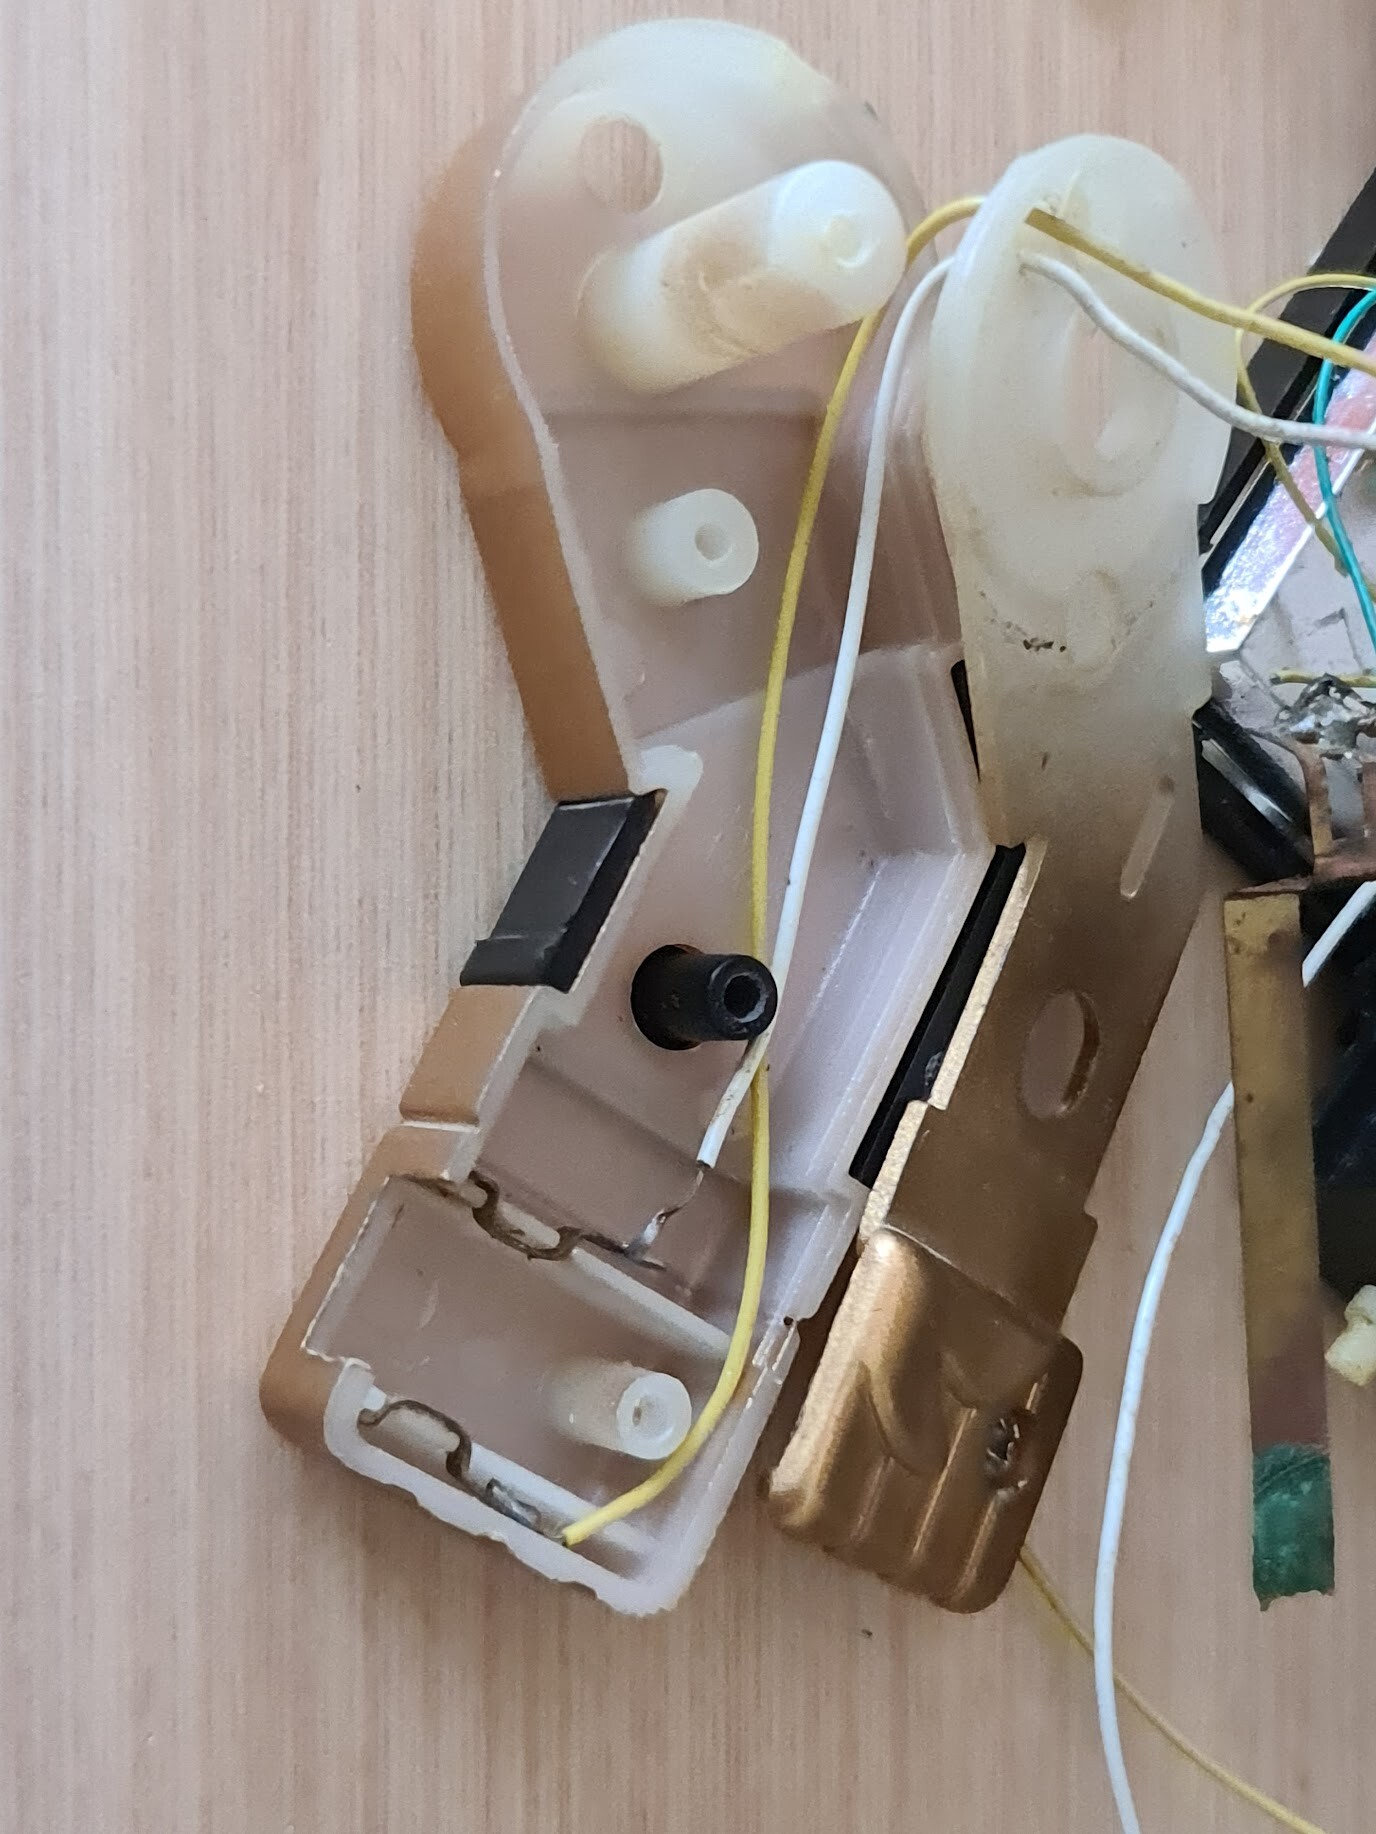
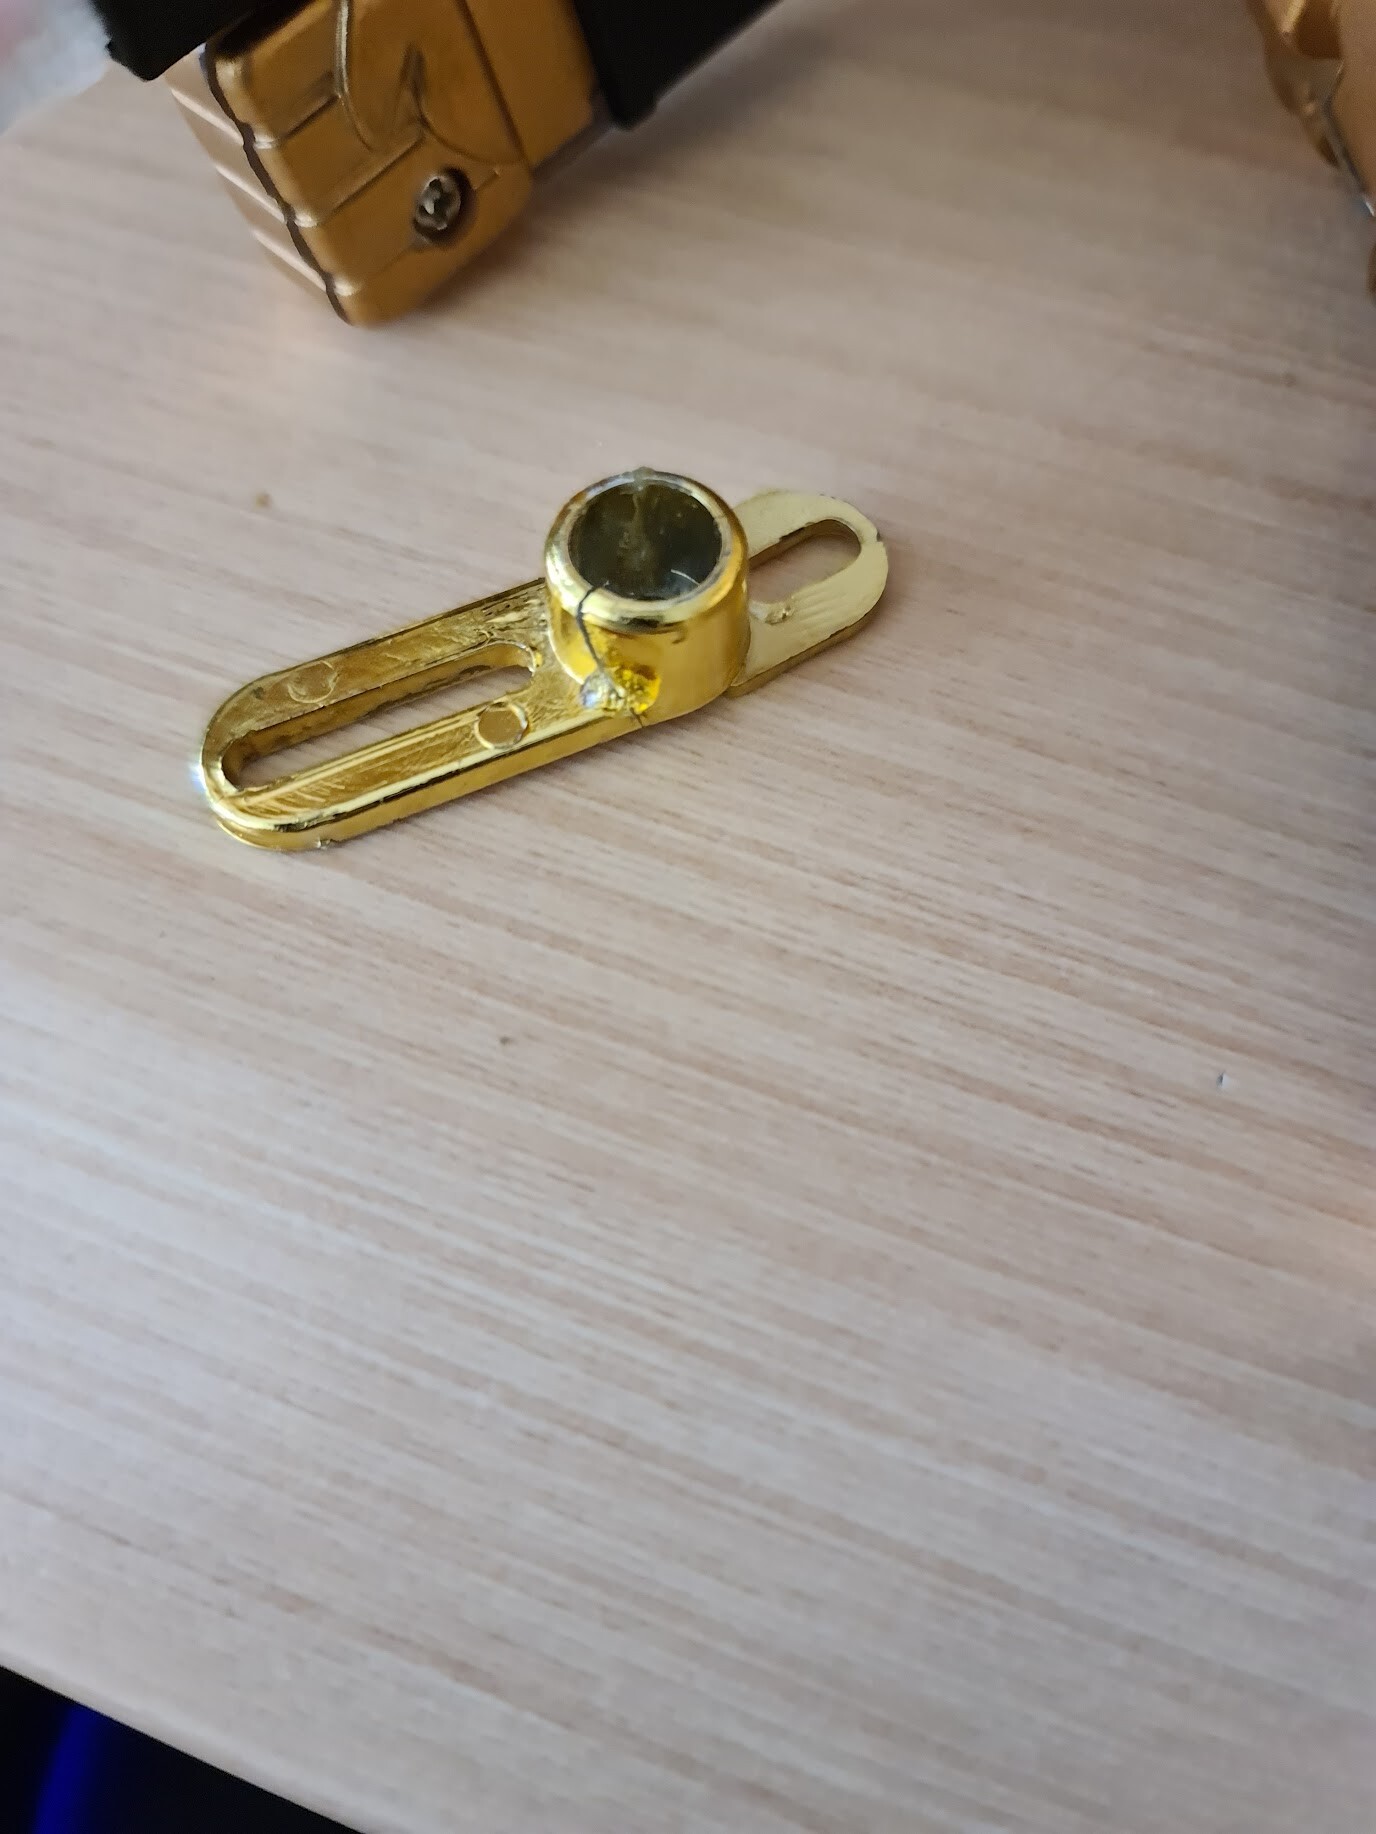
First I checked up the product for the faulty parts. The most recognizable problem was the corroded battery compartment. That was the main reason that the robot is not operating.
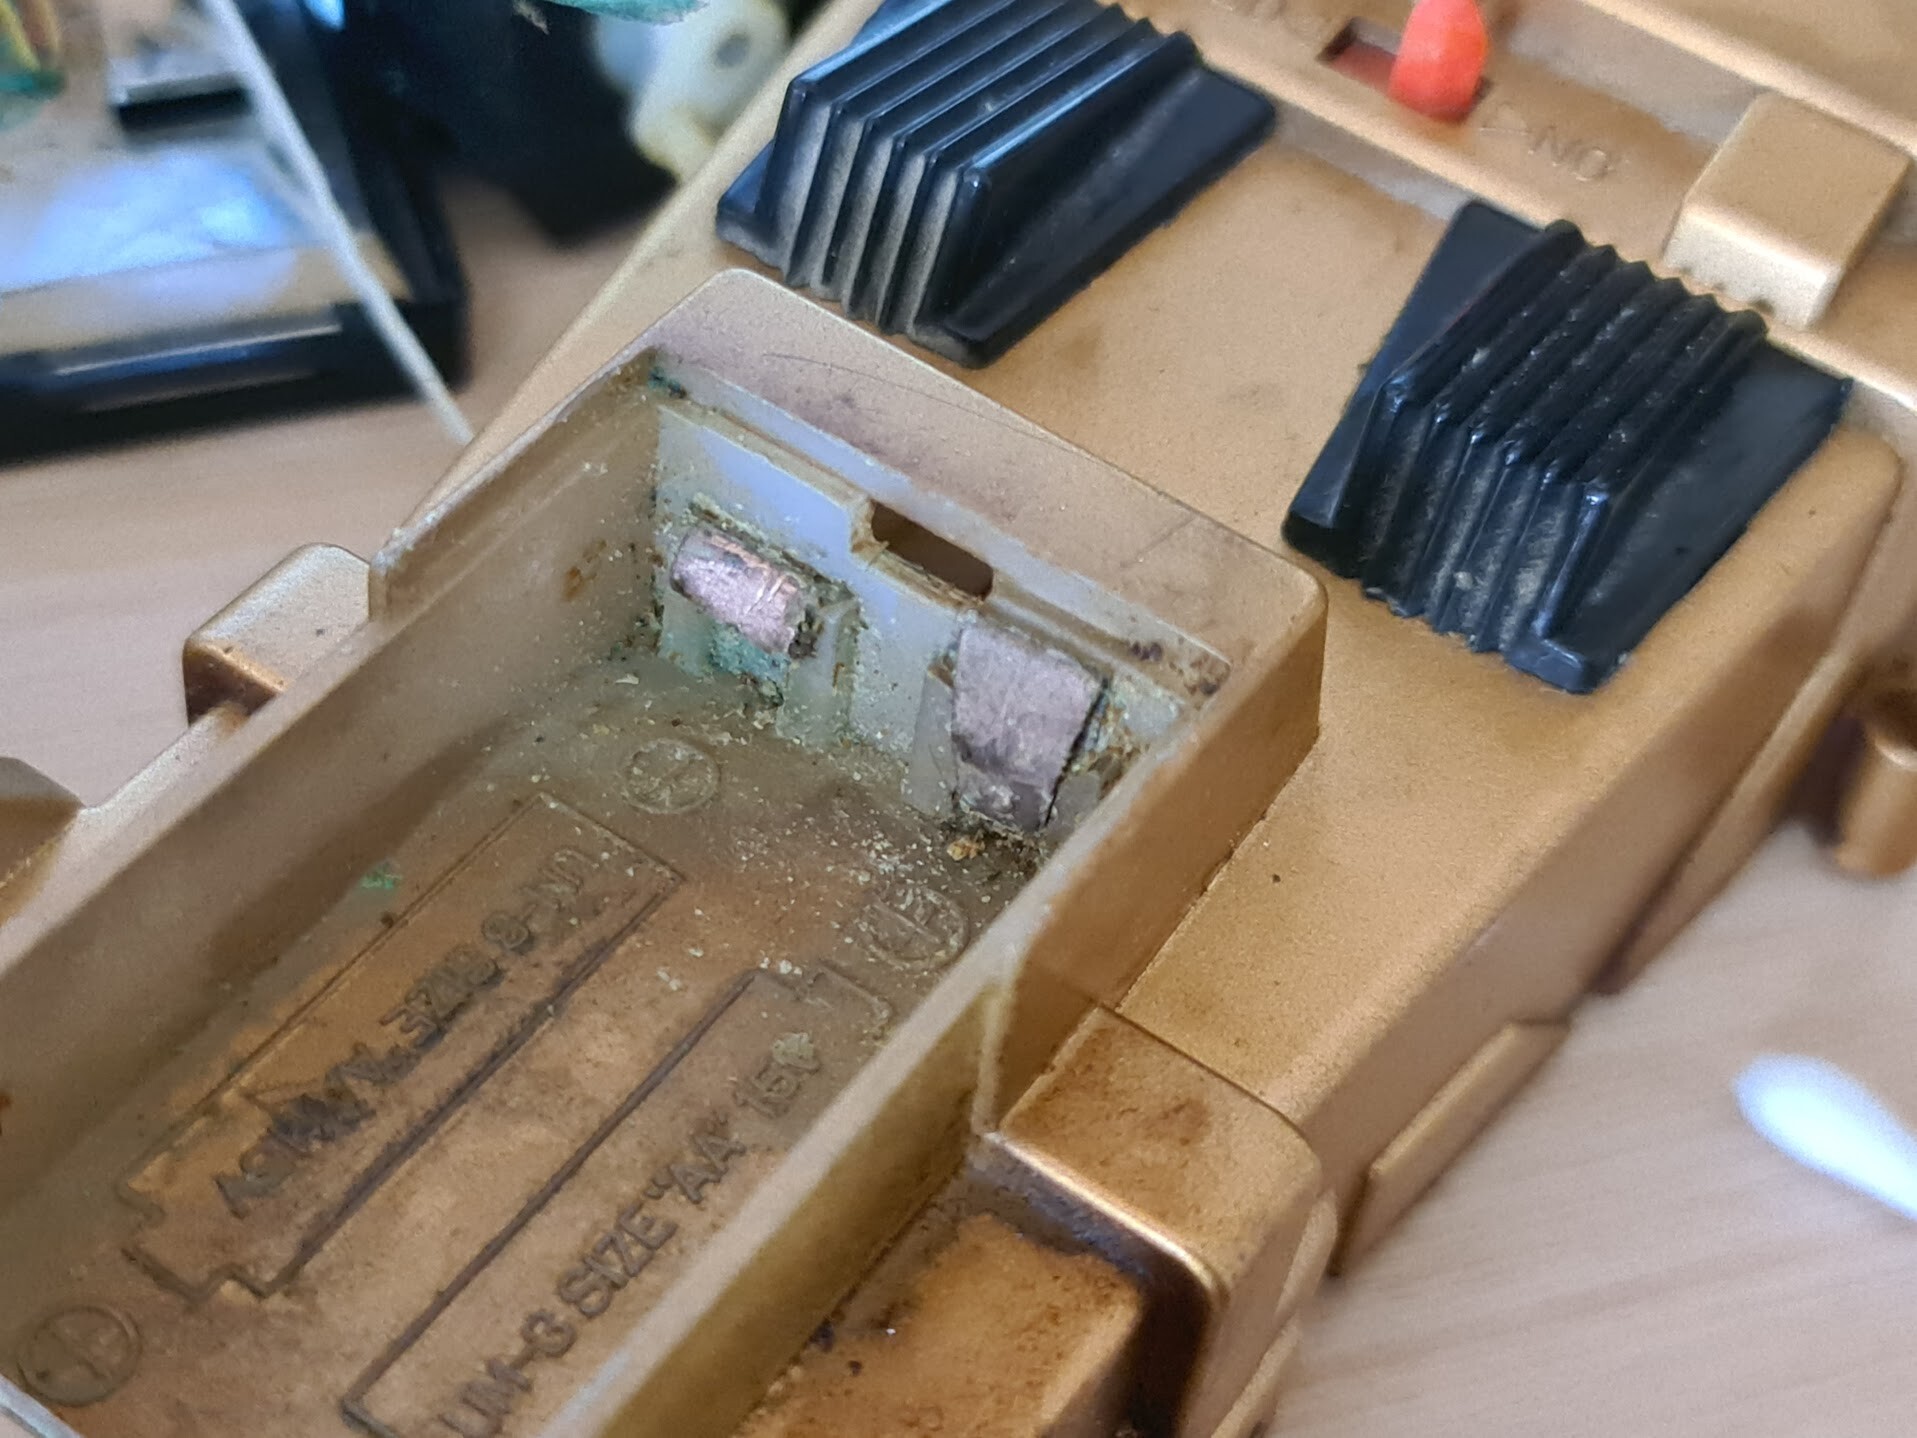
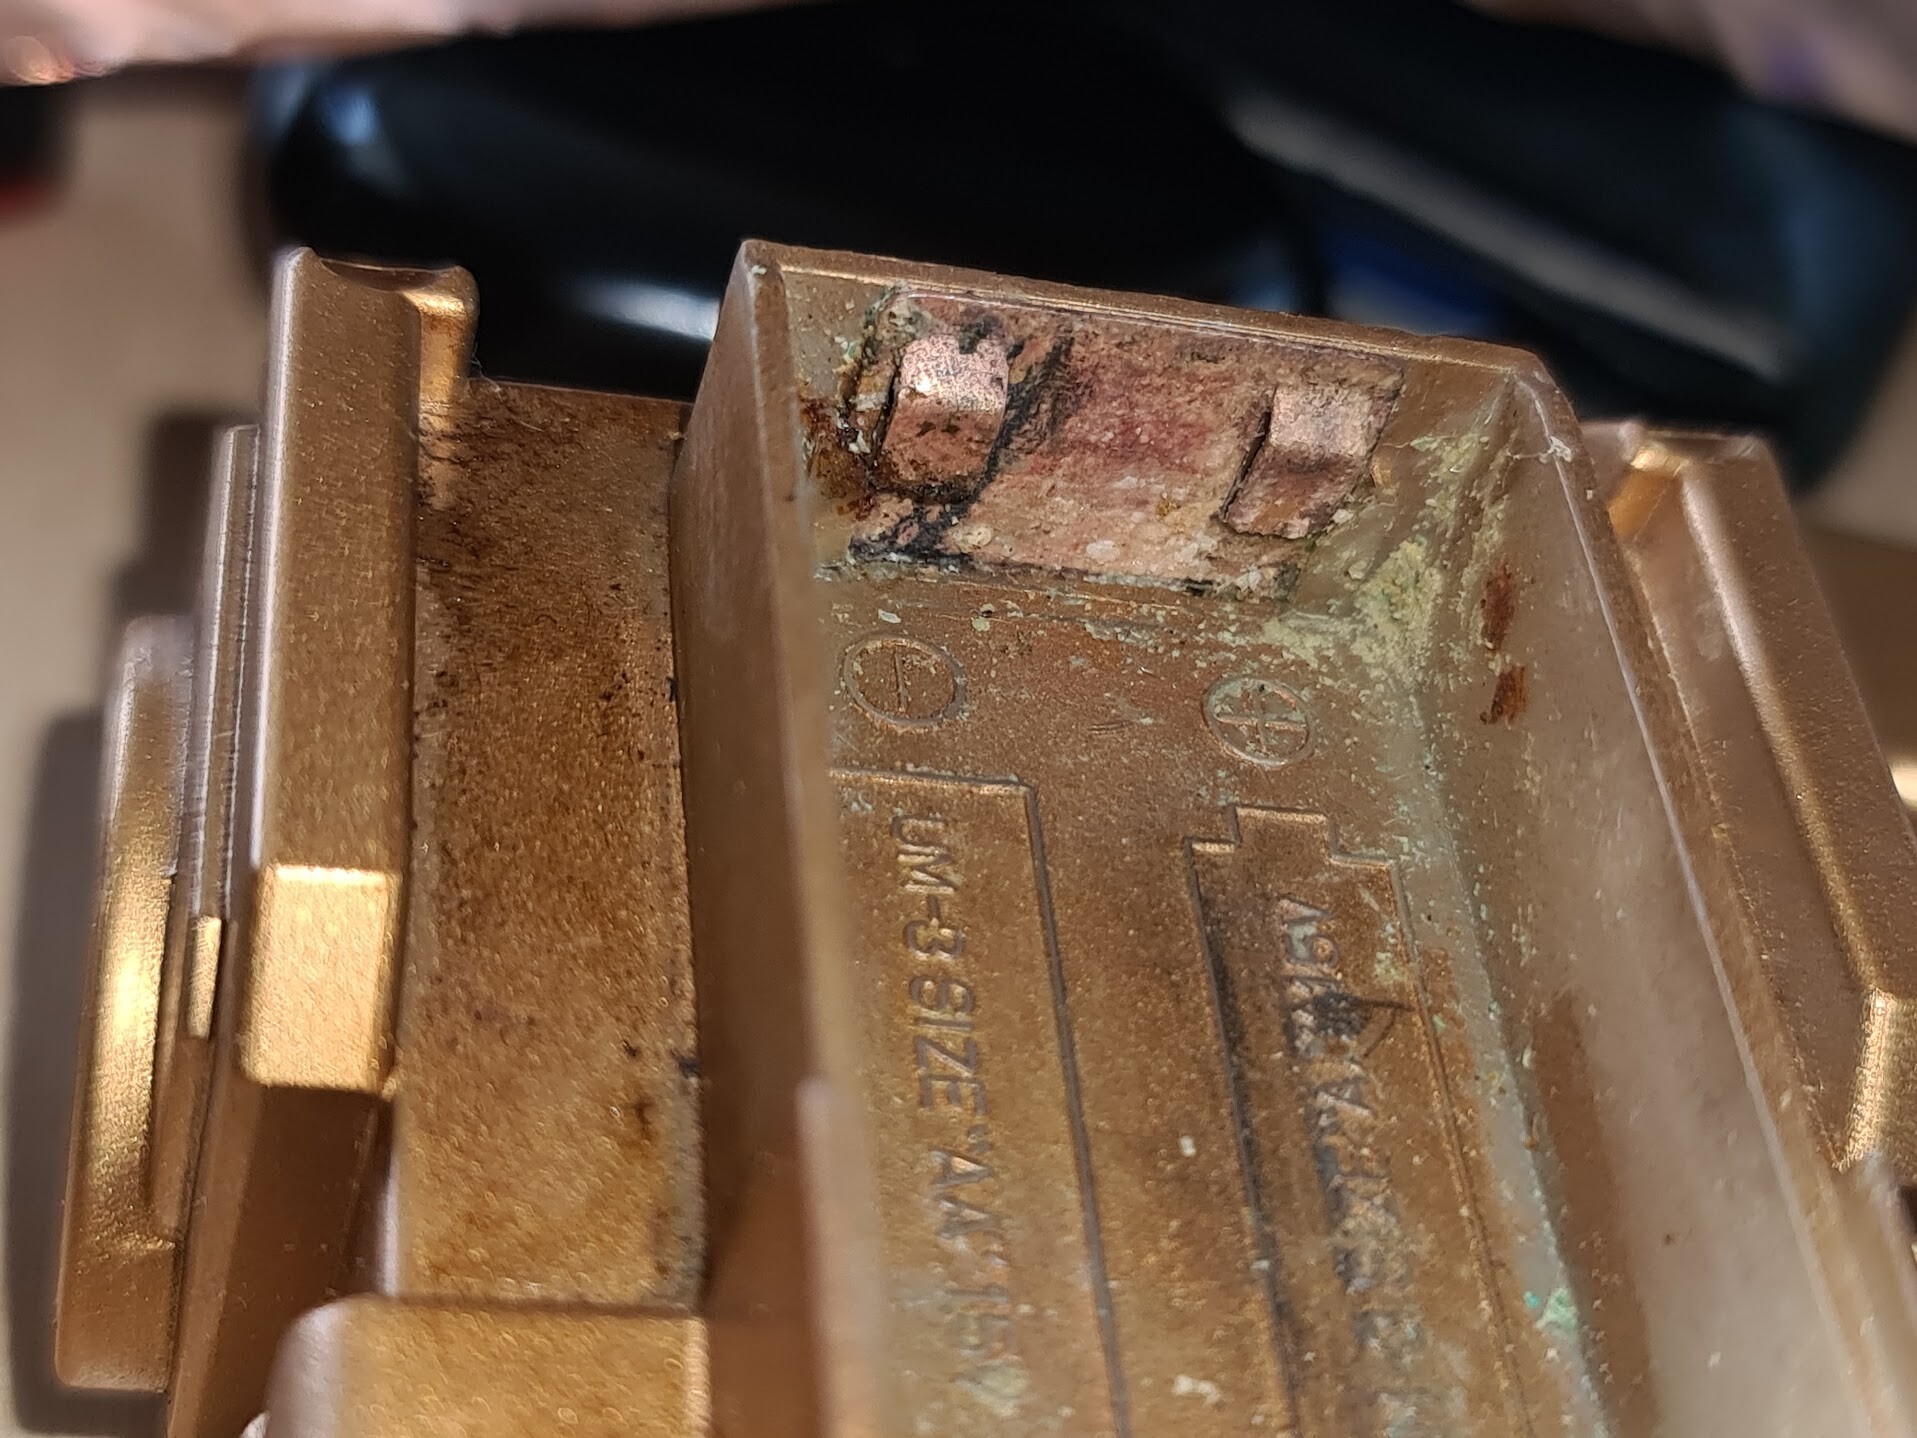
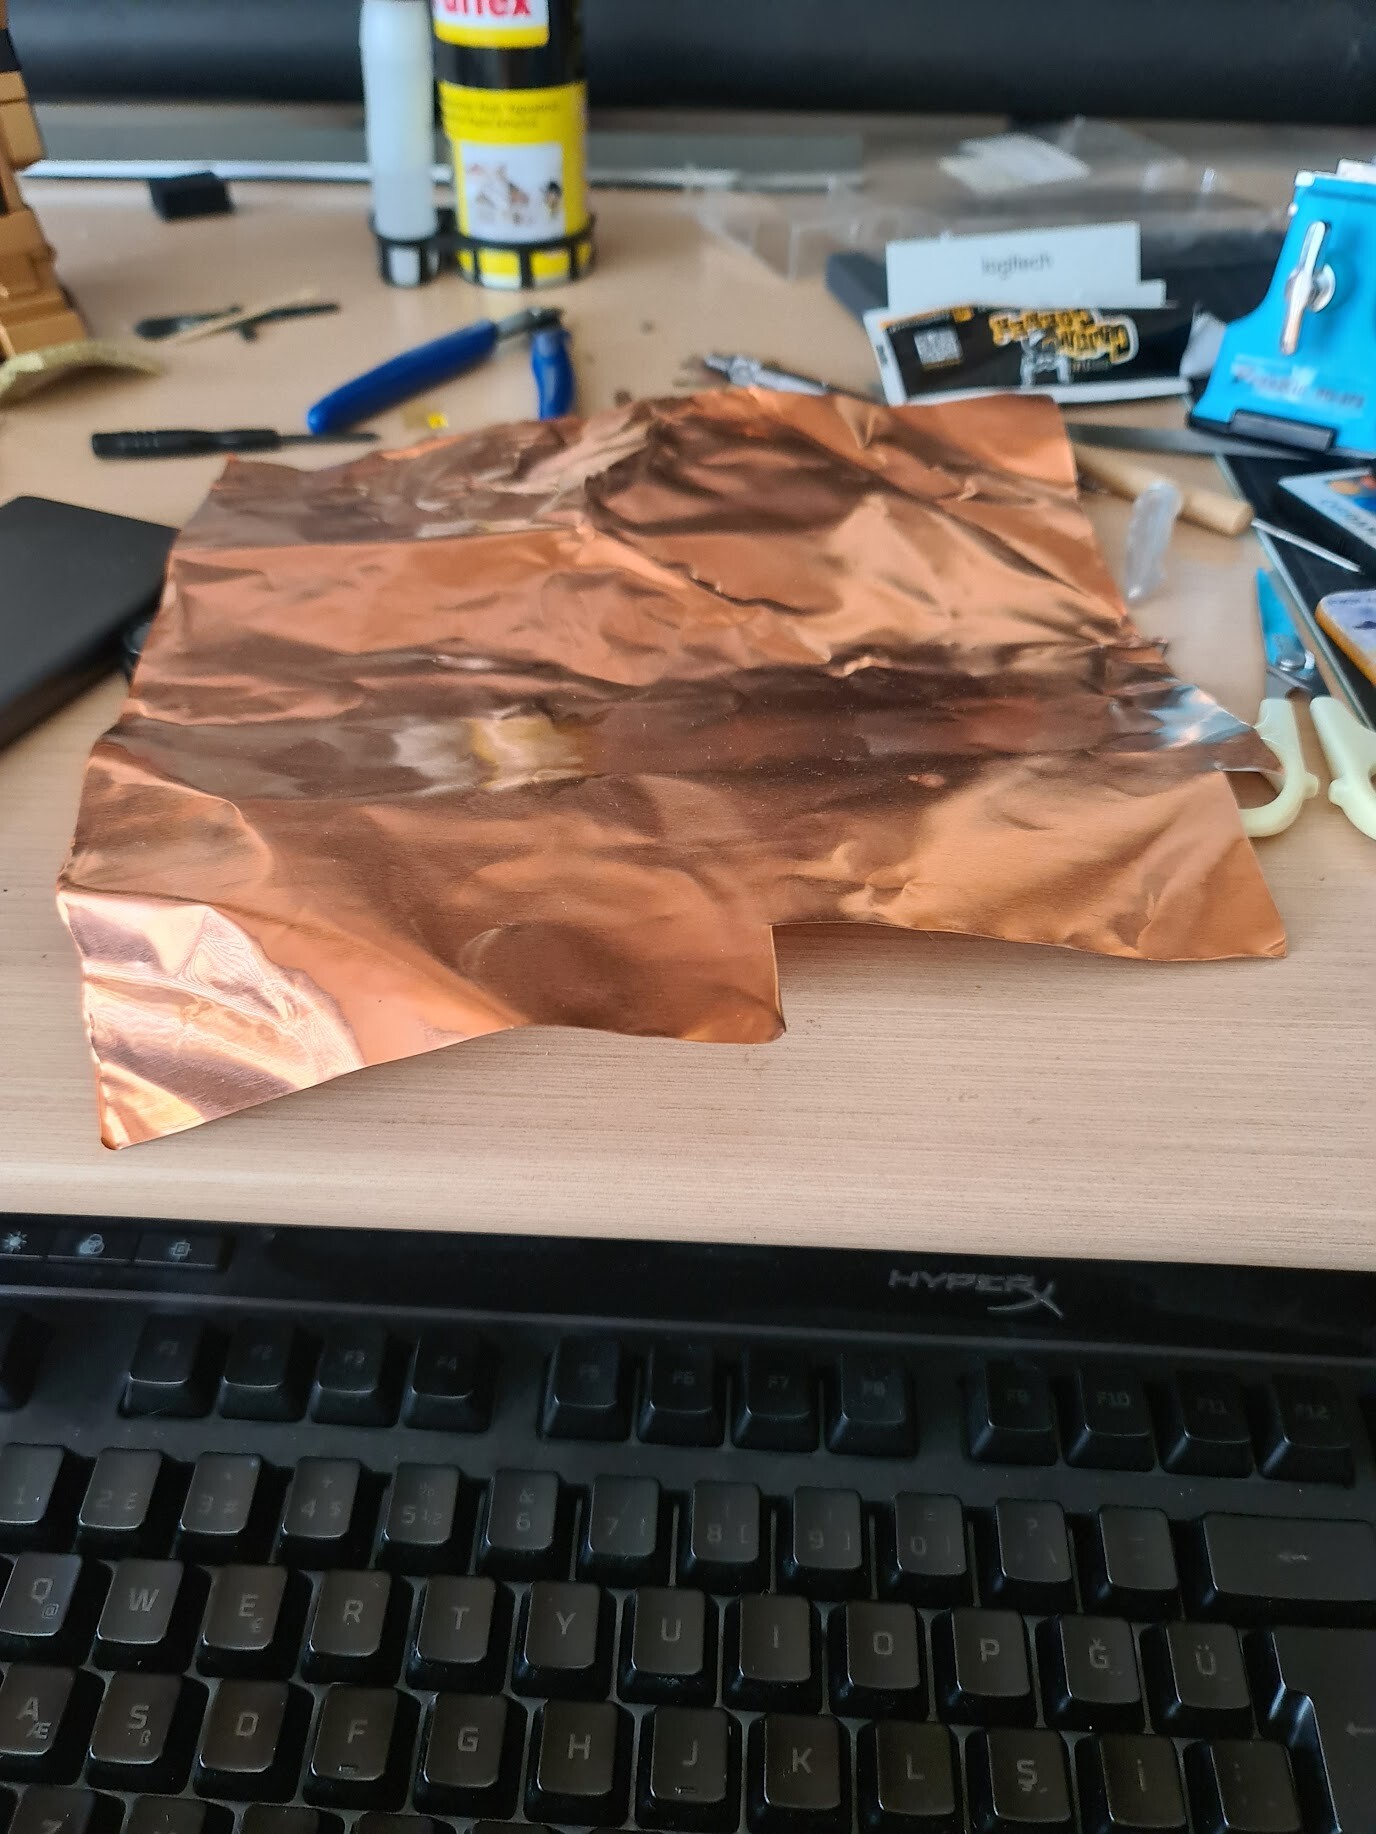
I find some brass copper sheet to replace that connections. Also I removed the cables from the corroded parts and dumped all of them.
I tested the toy and it operated after that move.
Next I went for completing the missing parts of the robot.
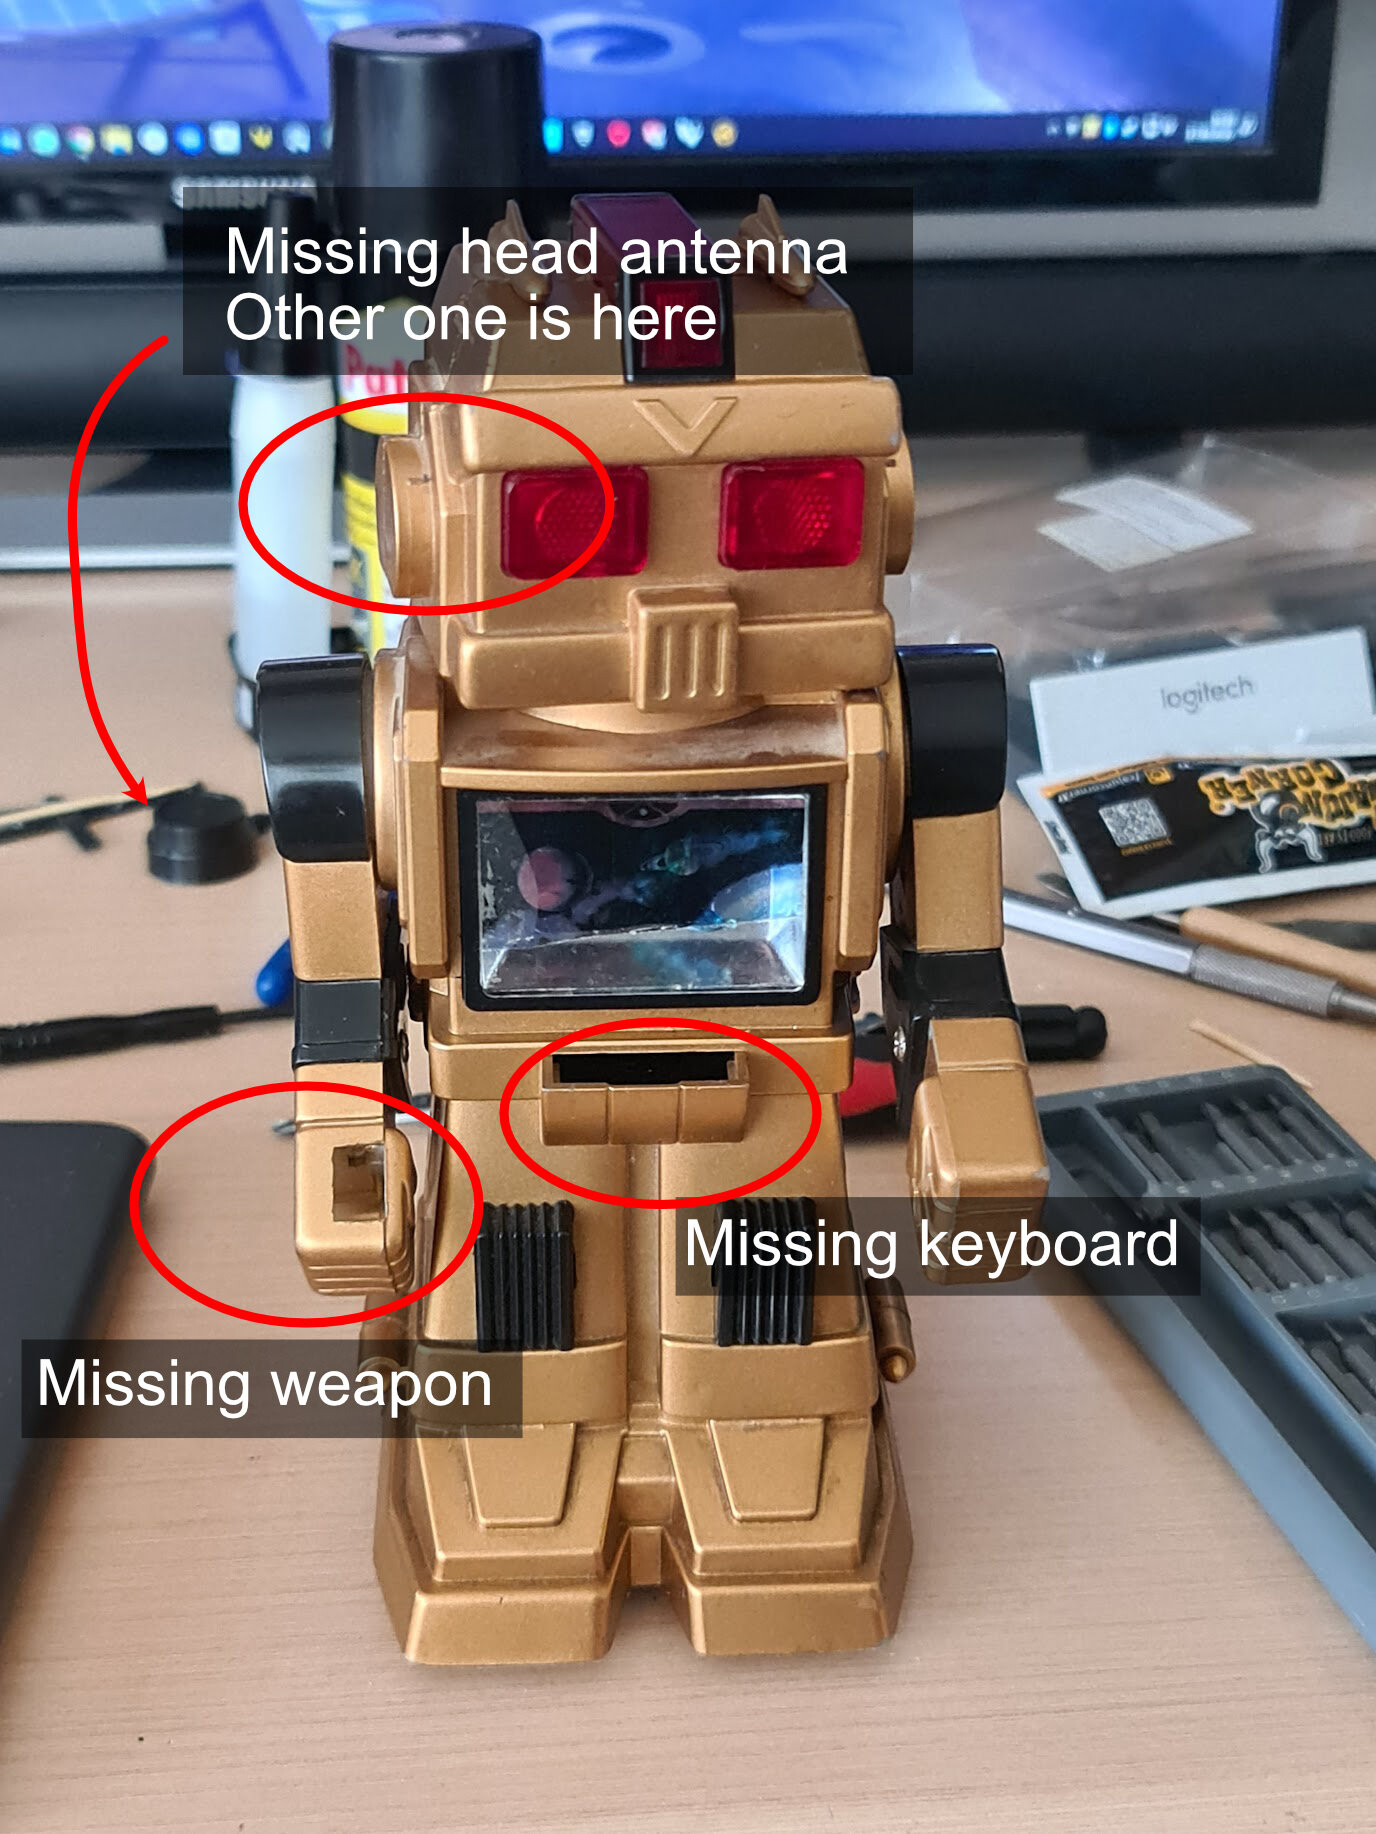
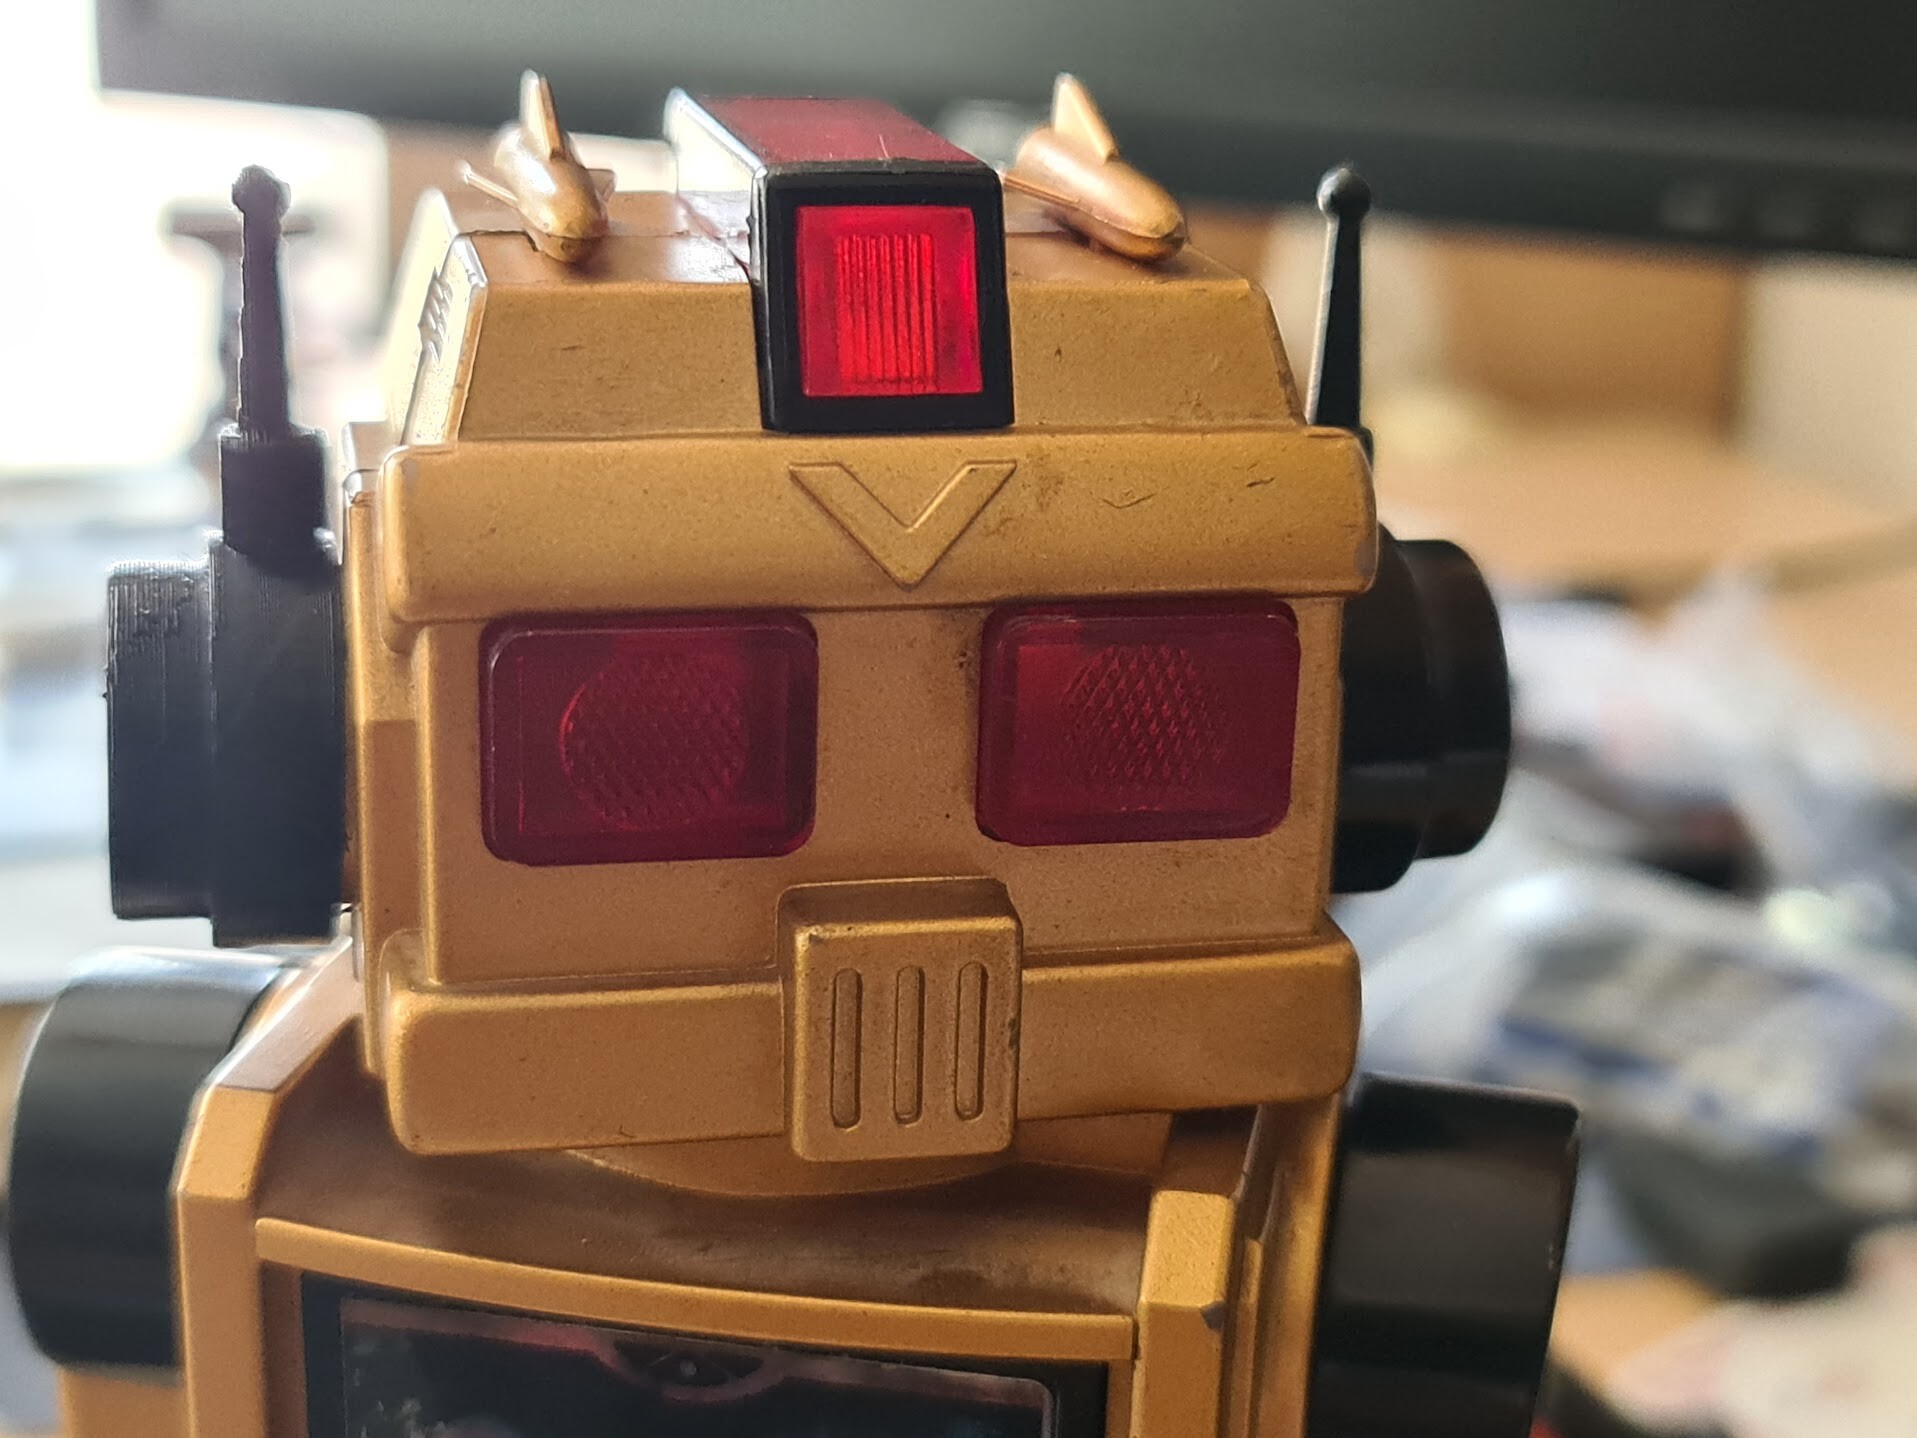
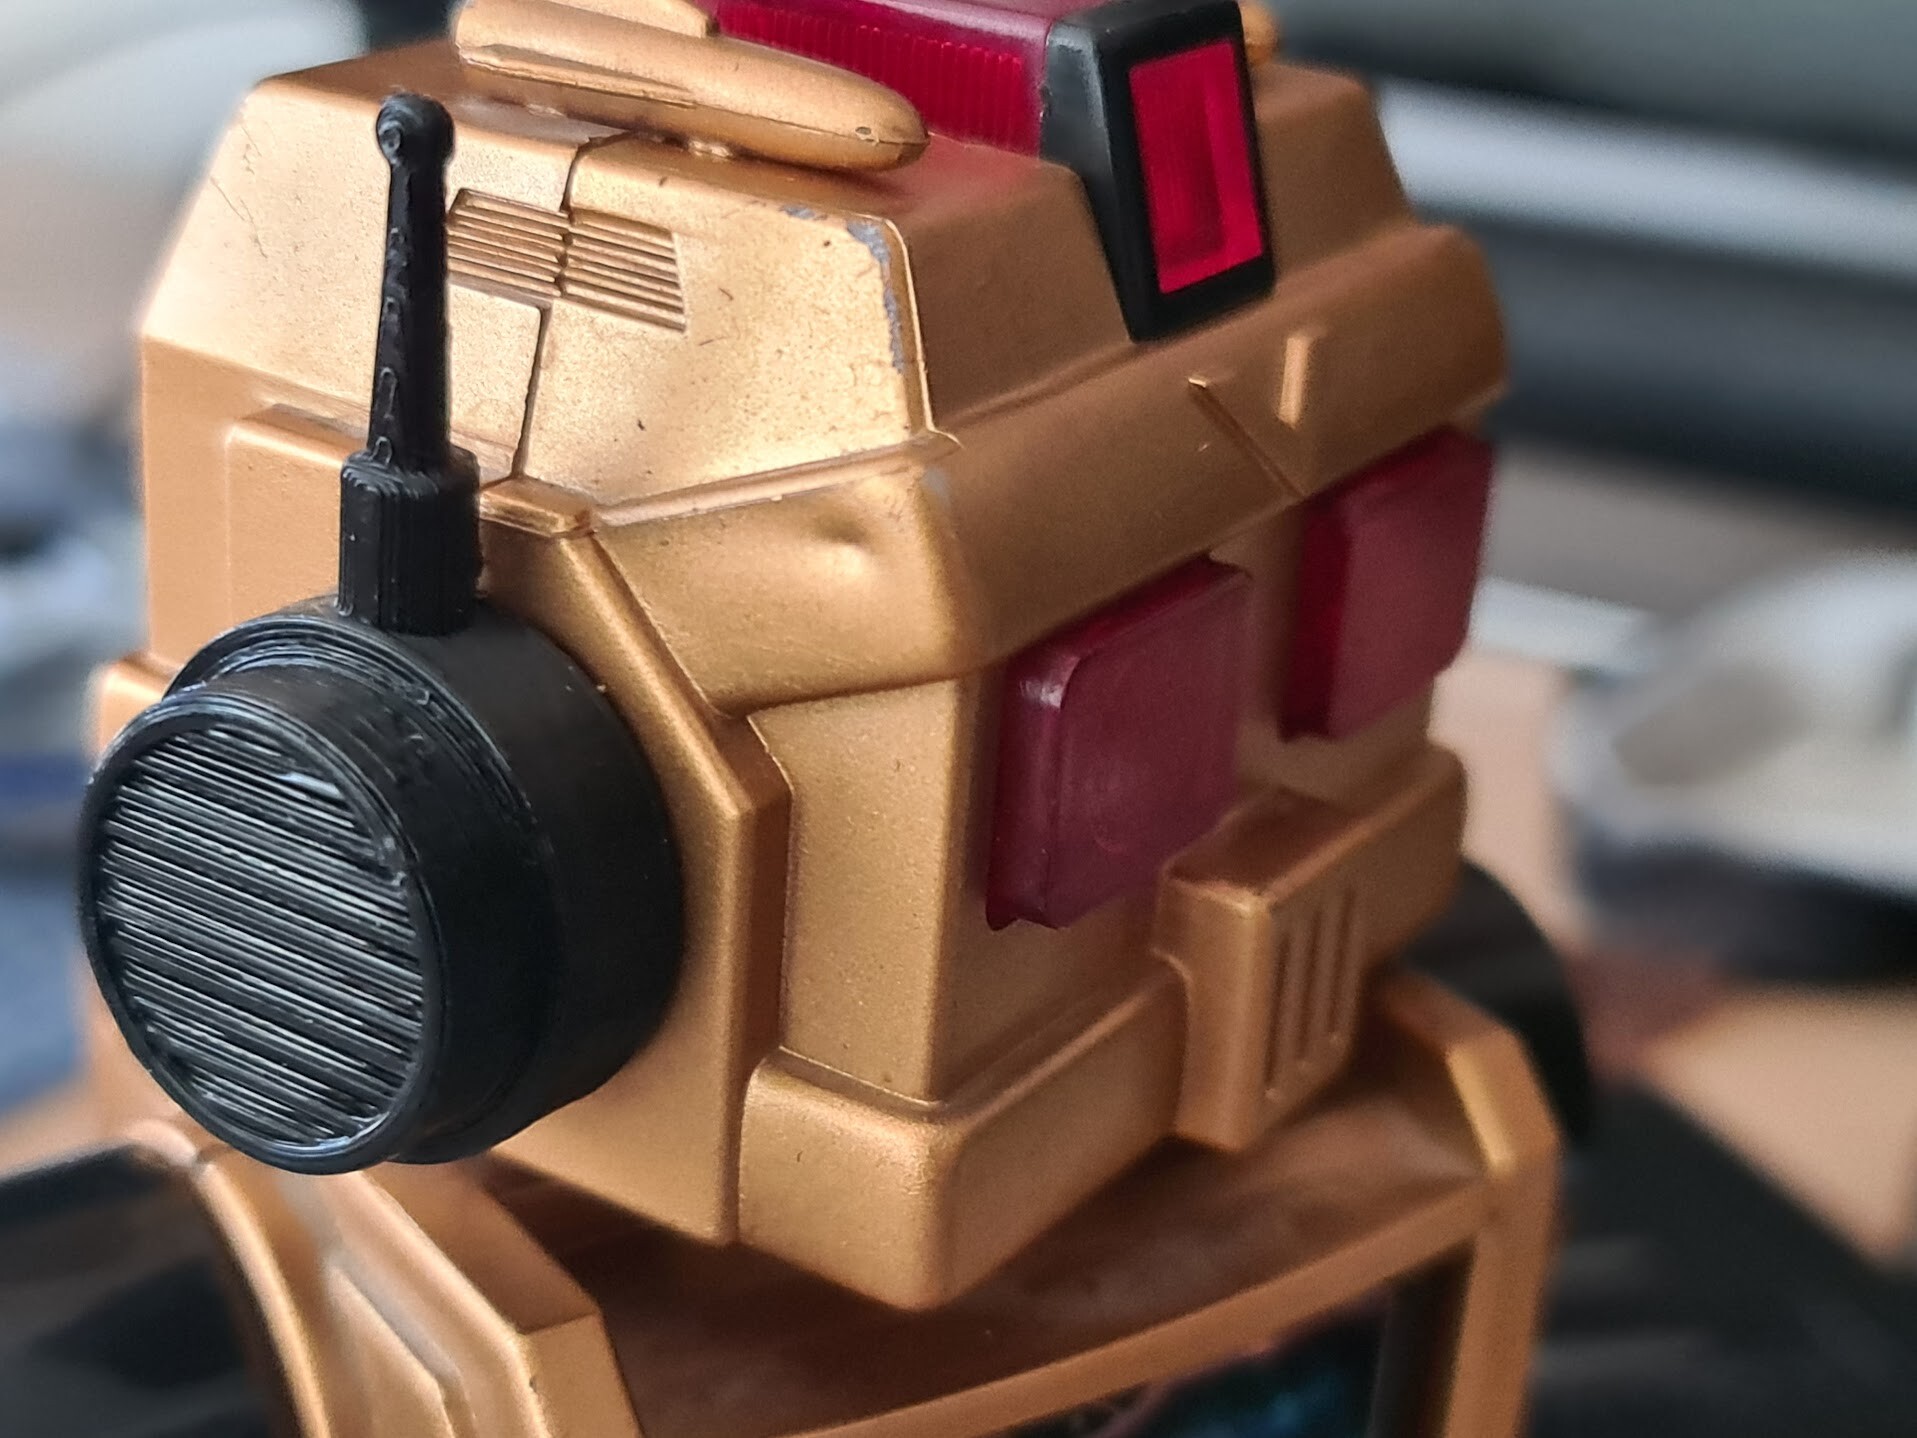
Antenna part was easy. I modeled it with Solidworks by measuring the one at hand.
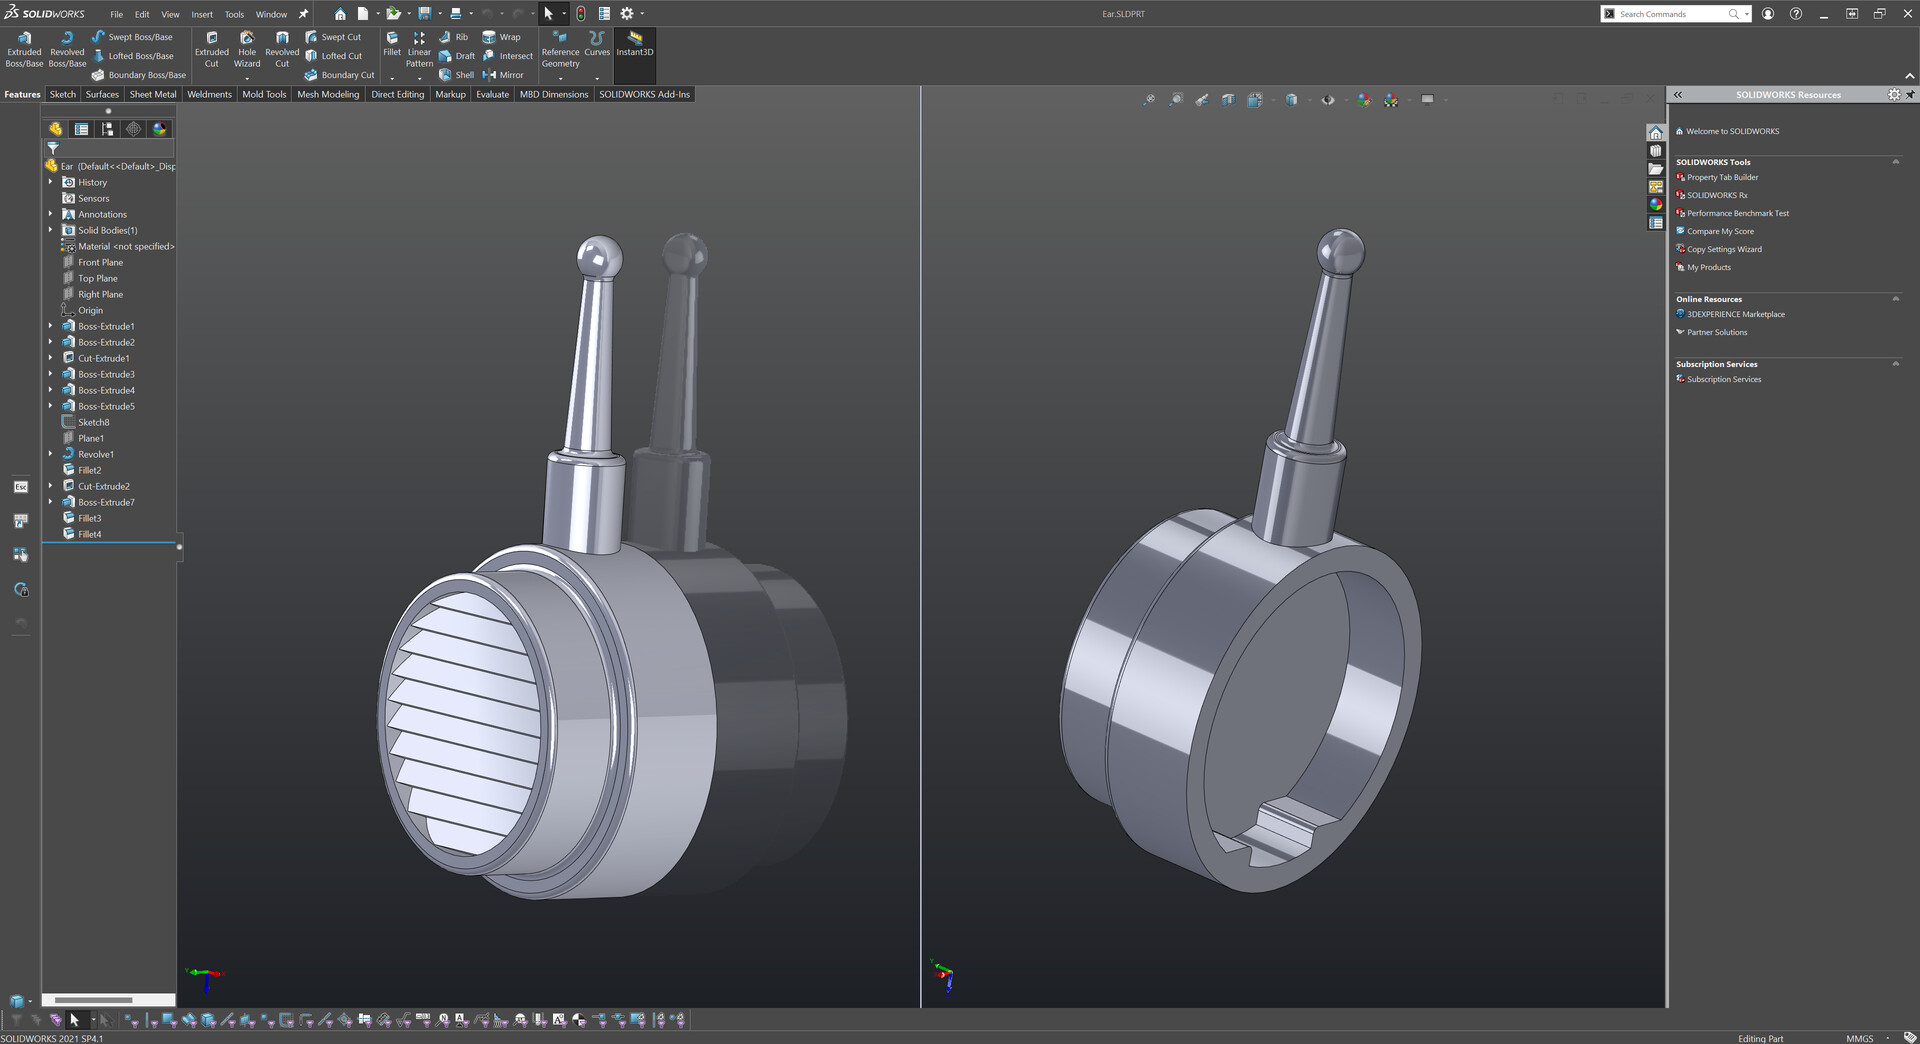
I 3d-printed the part with my Ender 3-v2 printer with black filament. We're good.
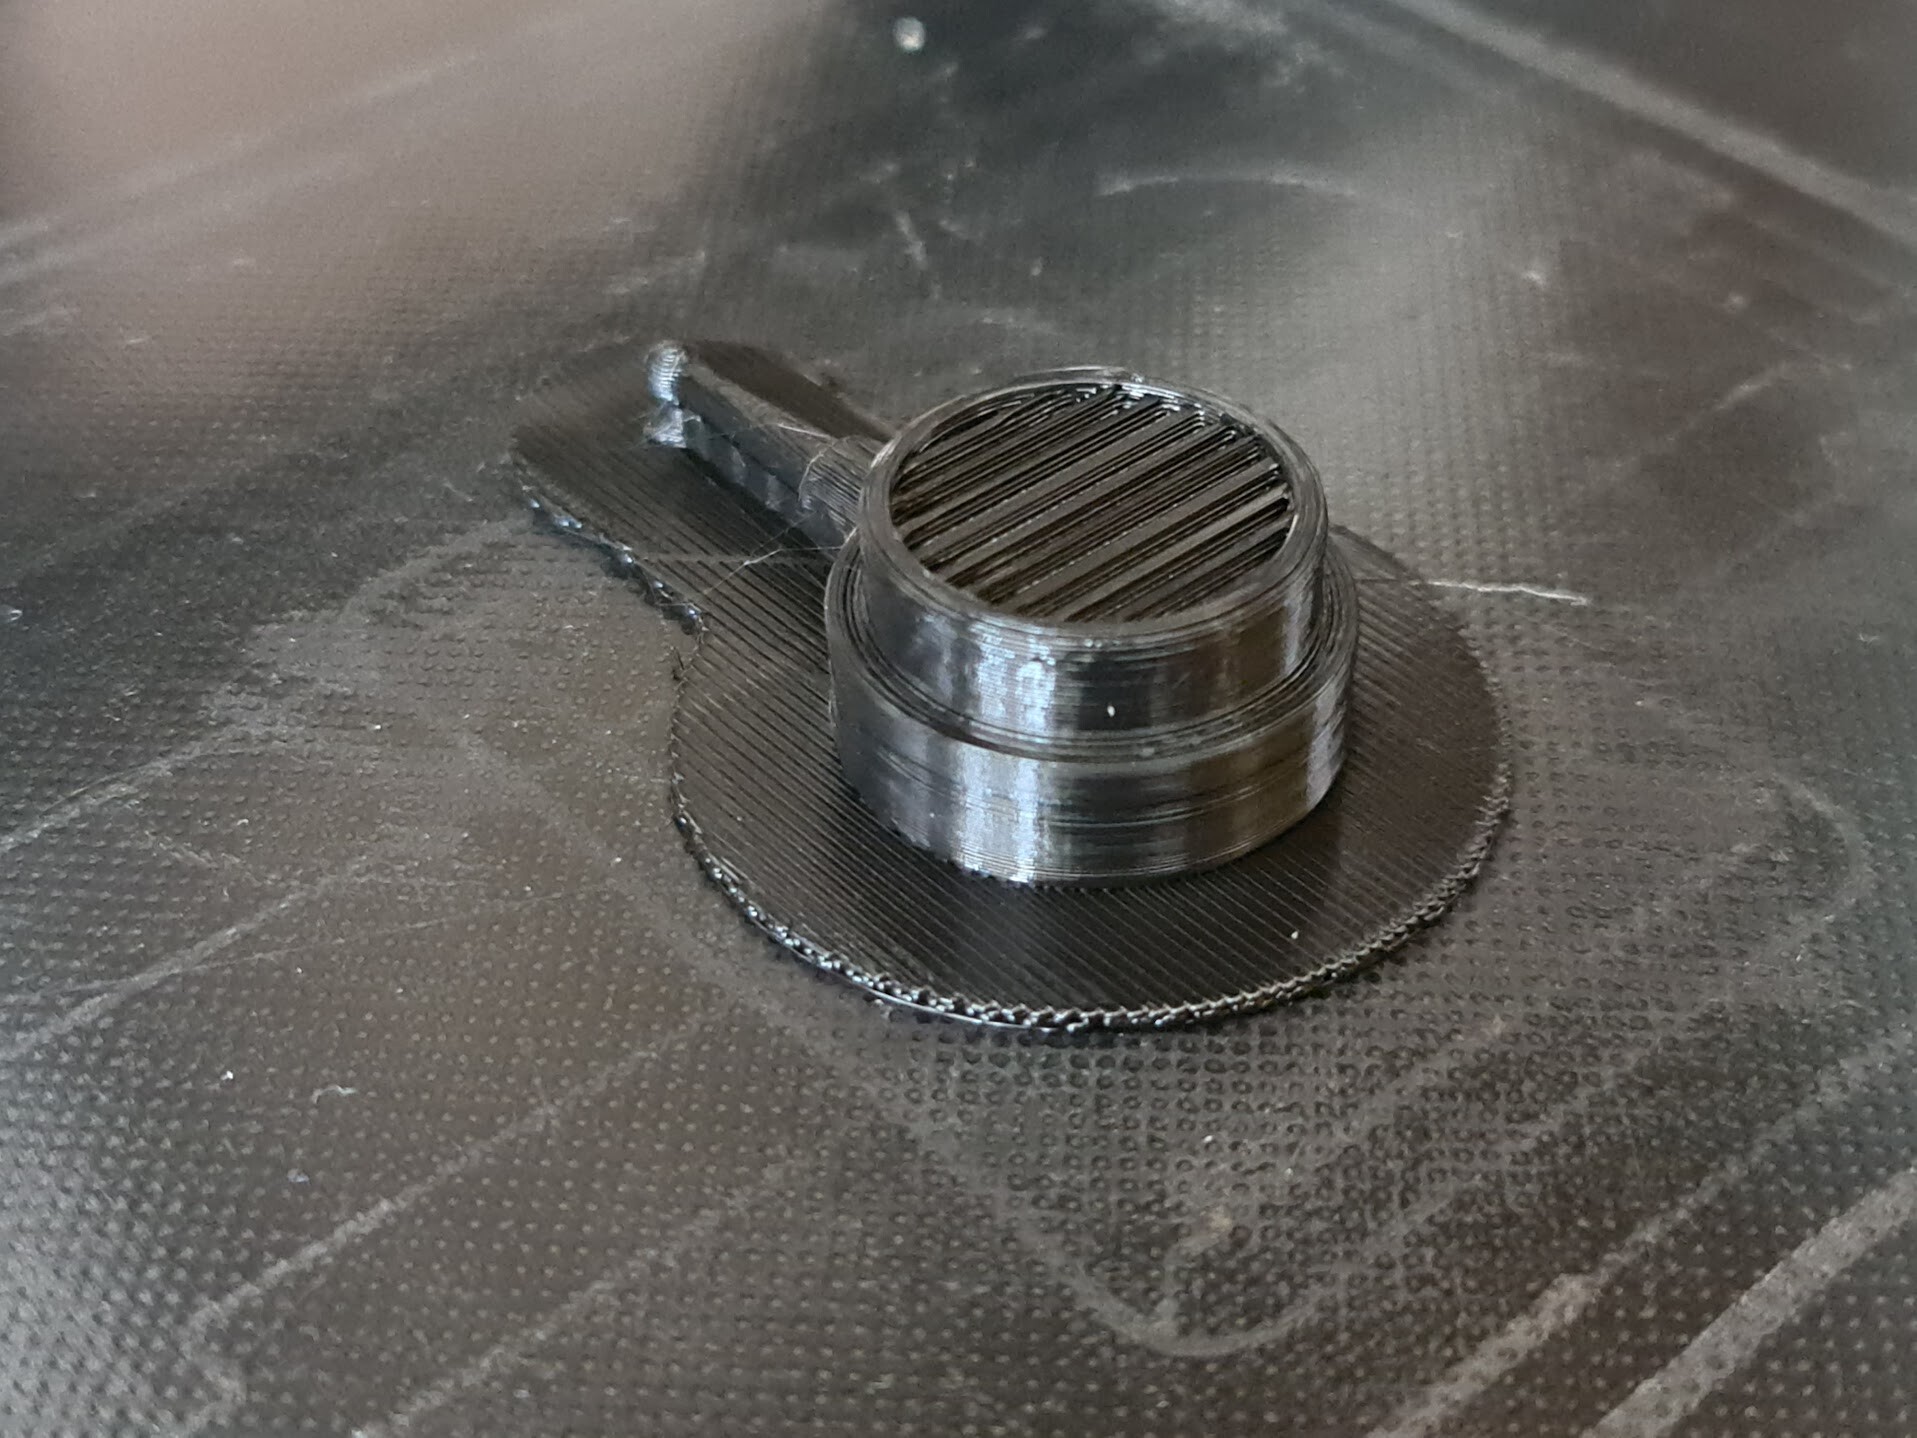
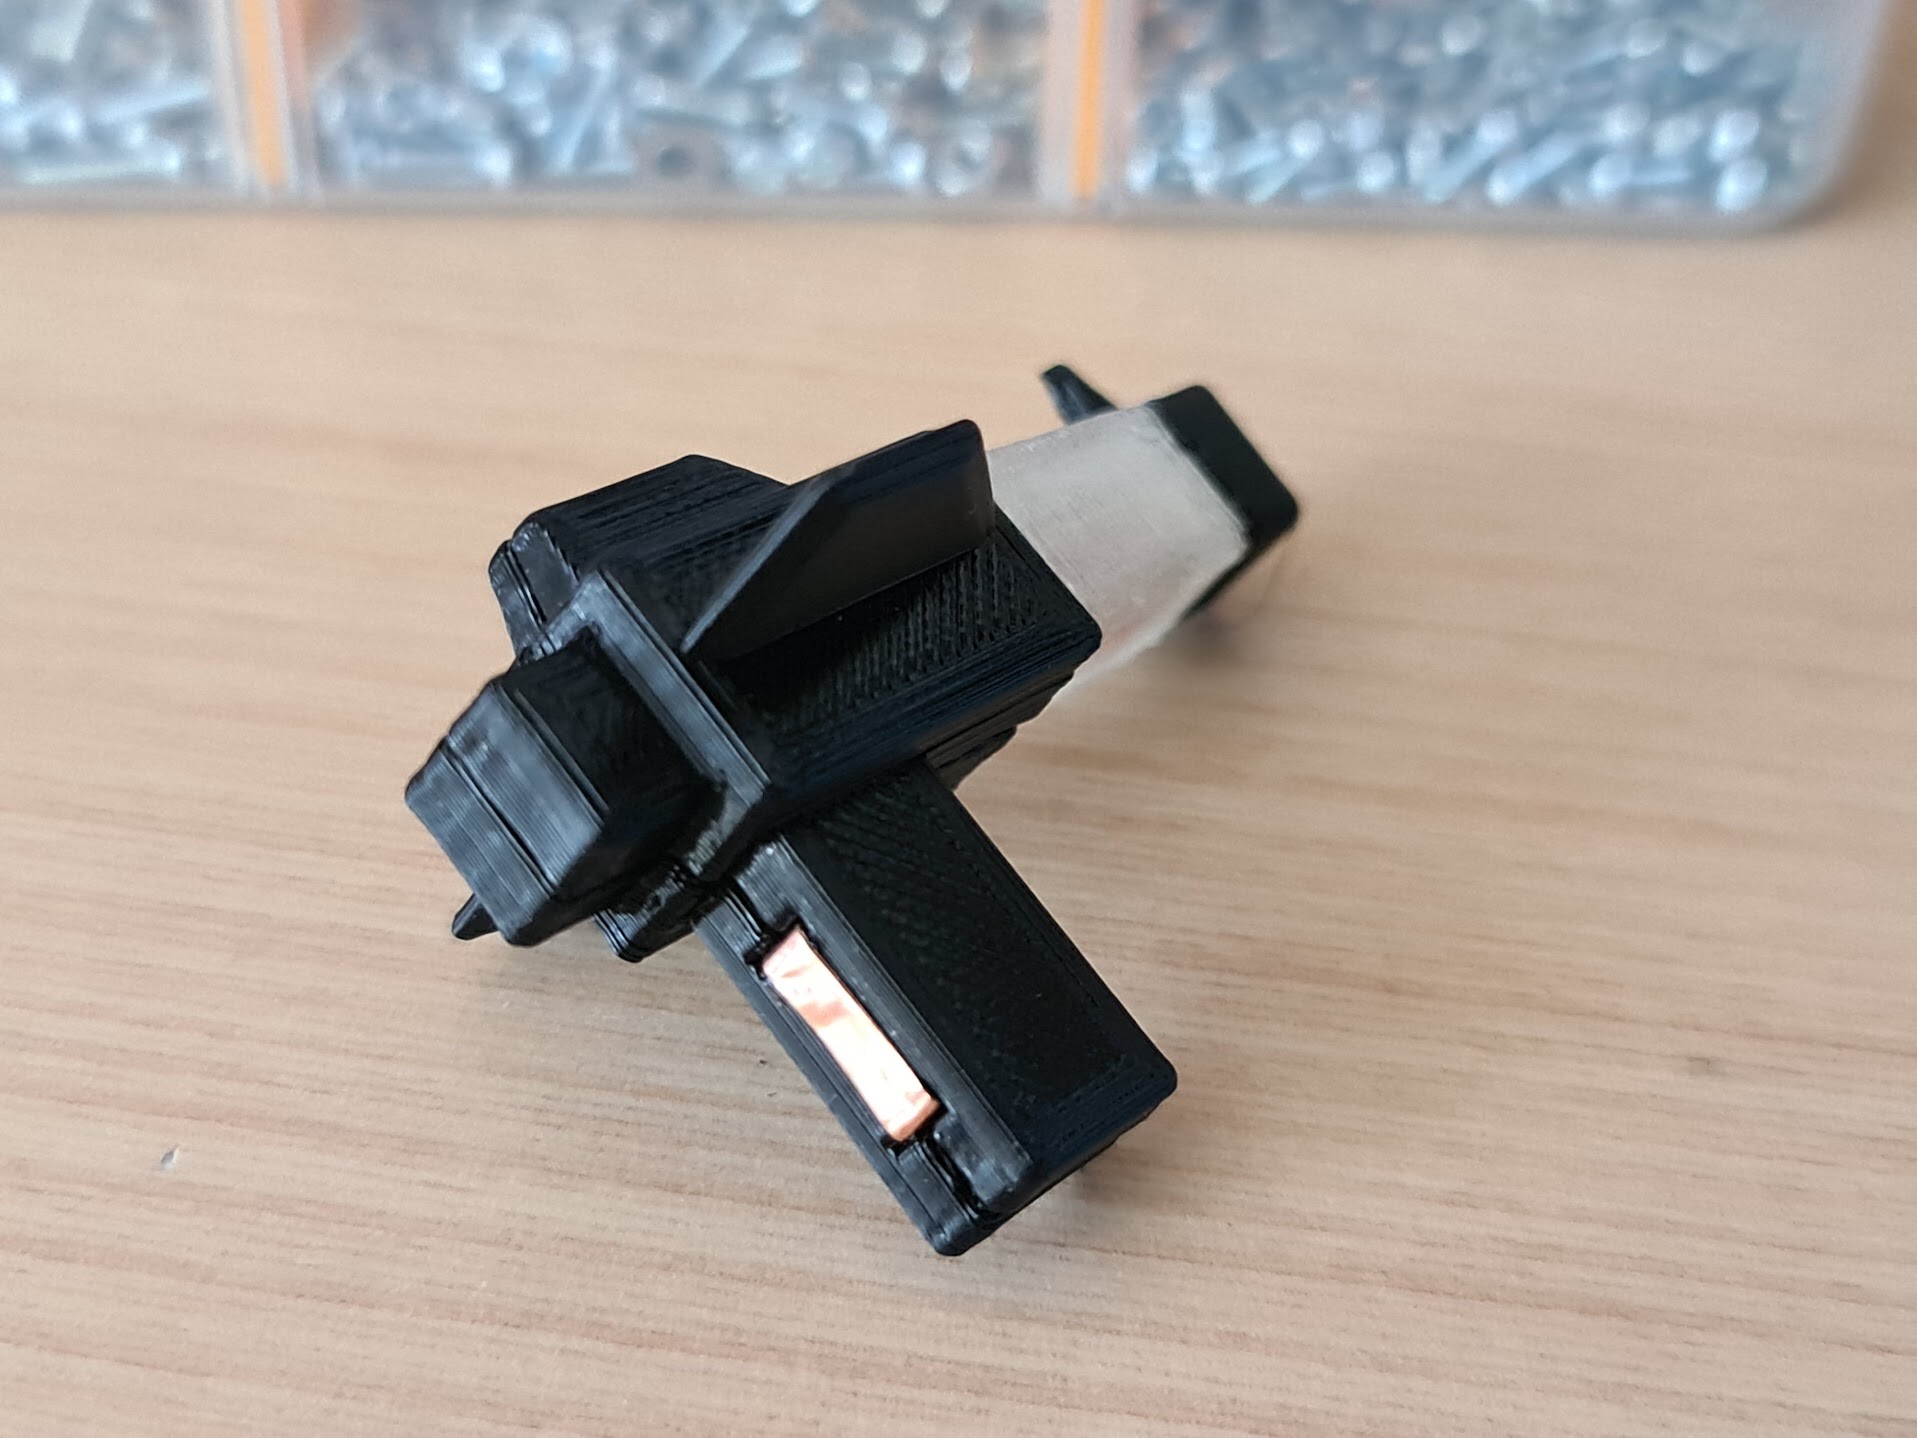
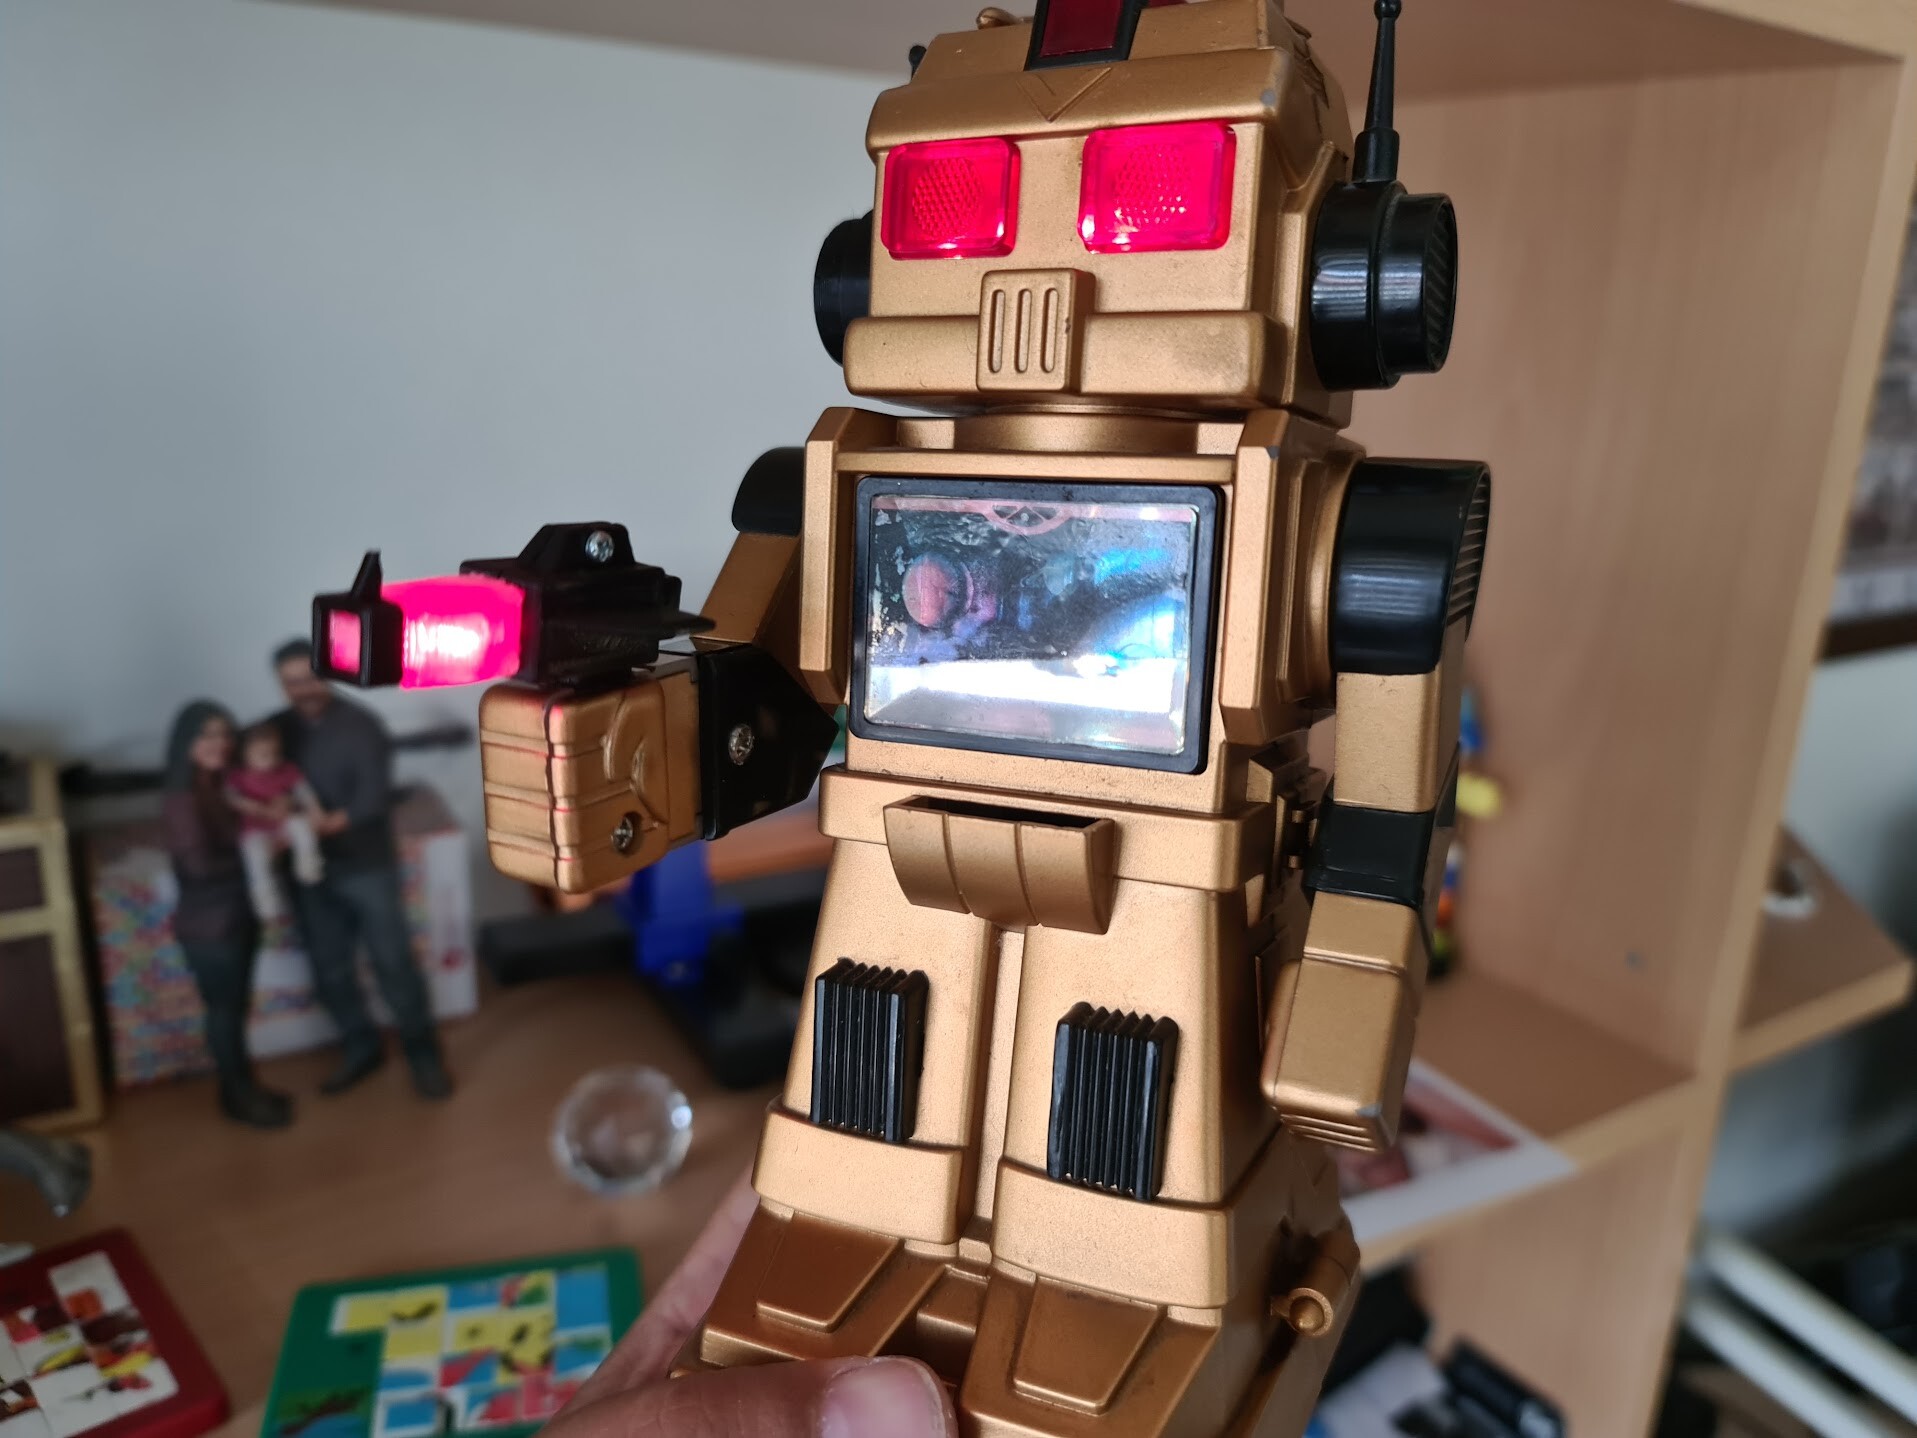
Nest step was the gun. The particular case with that gun is, it touches to the copper parts in the arm of the robot and got current to operate.
It was missing for a long time. So I checked the internet to get some photos of the gun to model and print it.
I had pretty much reference to 3d model the gun. For the inside part of it, I referred to my previous experience on creating cases for the electronics :)
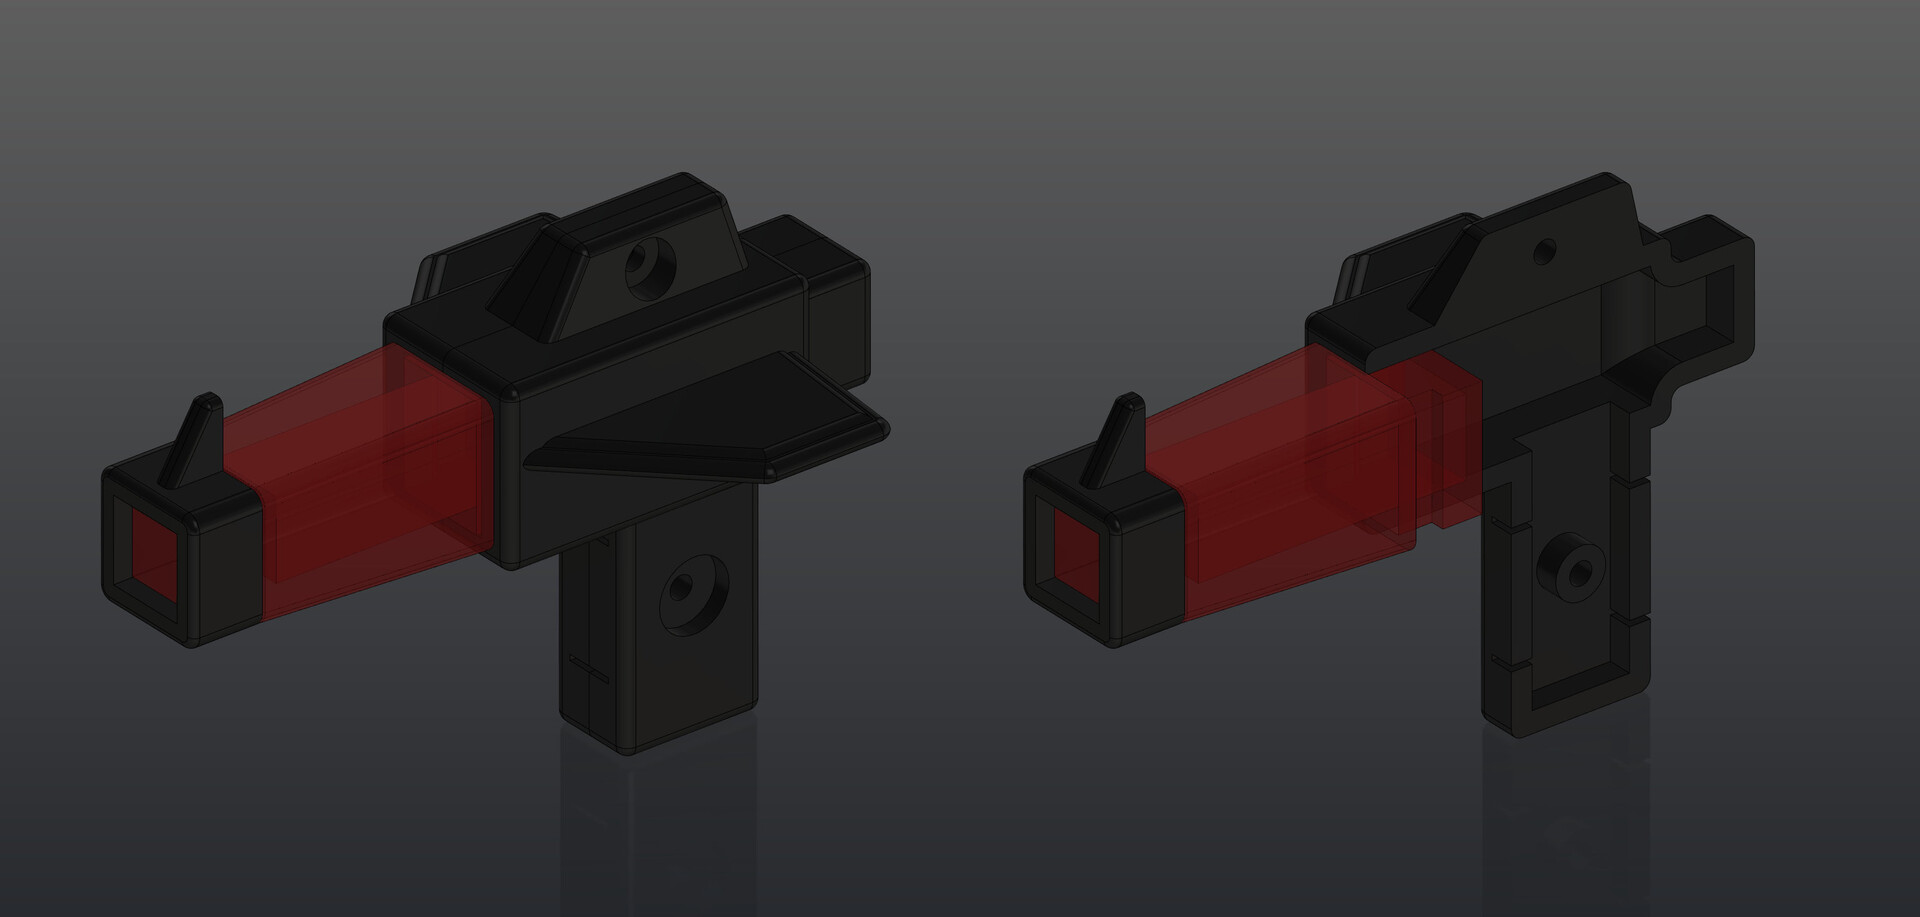
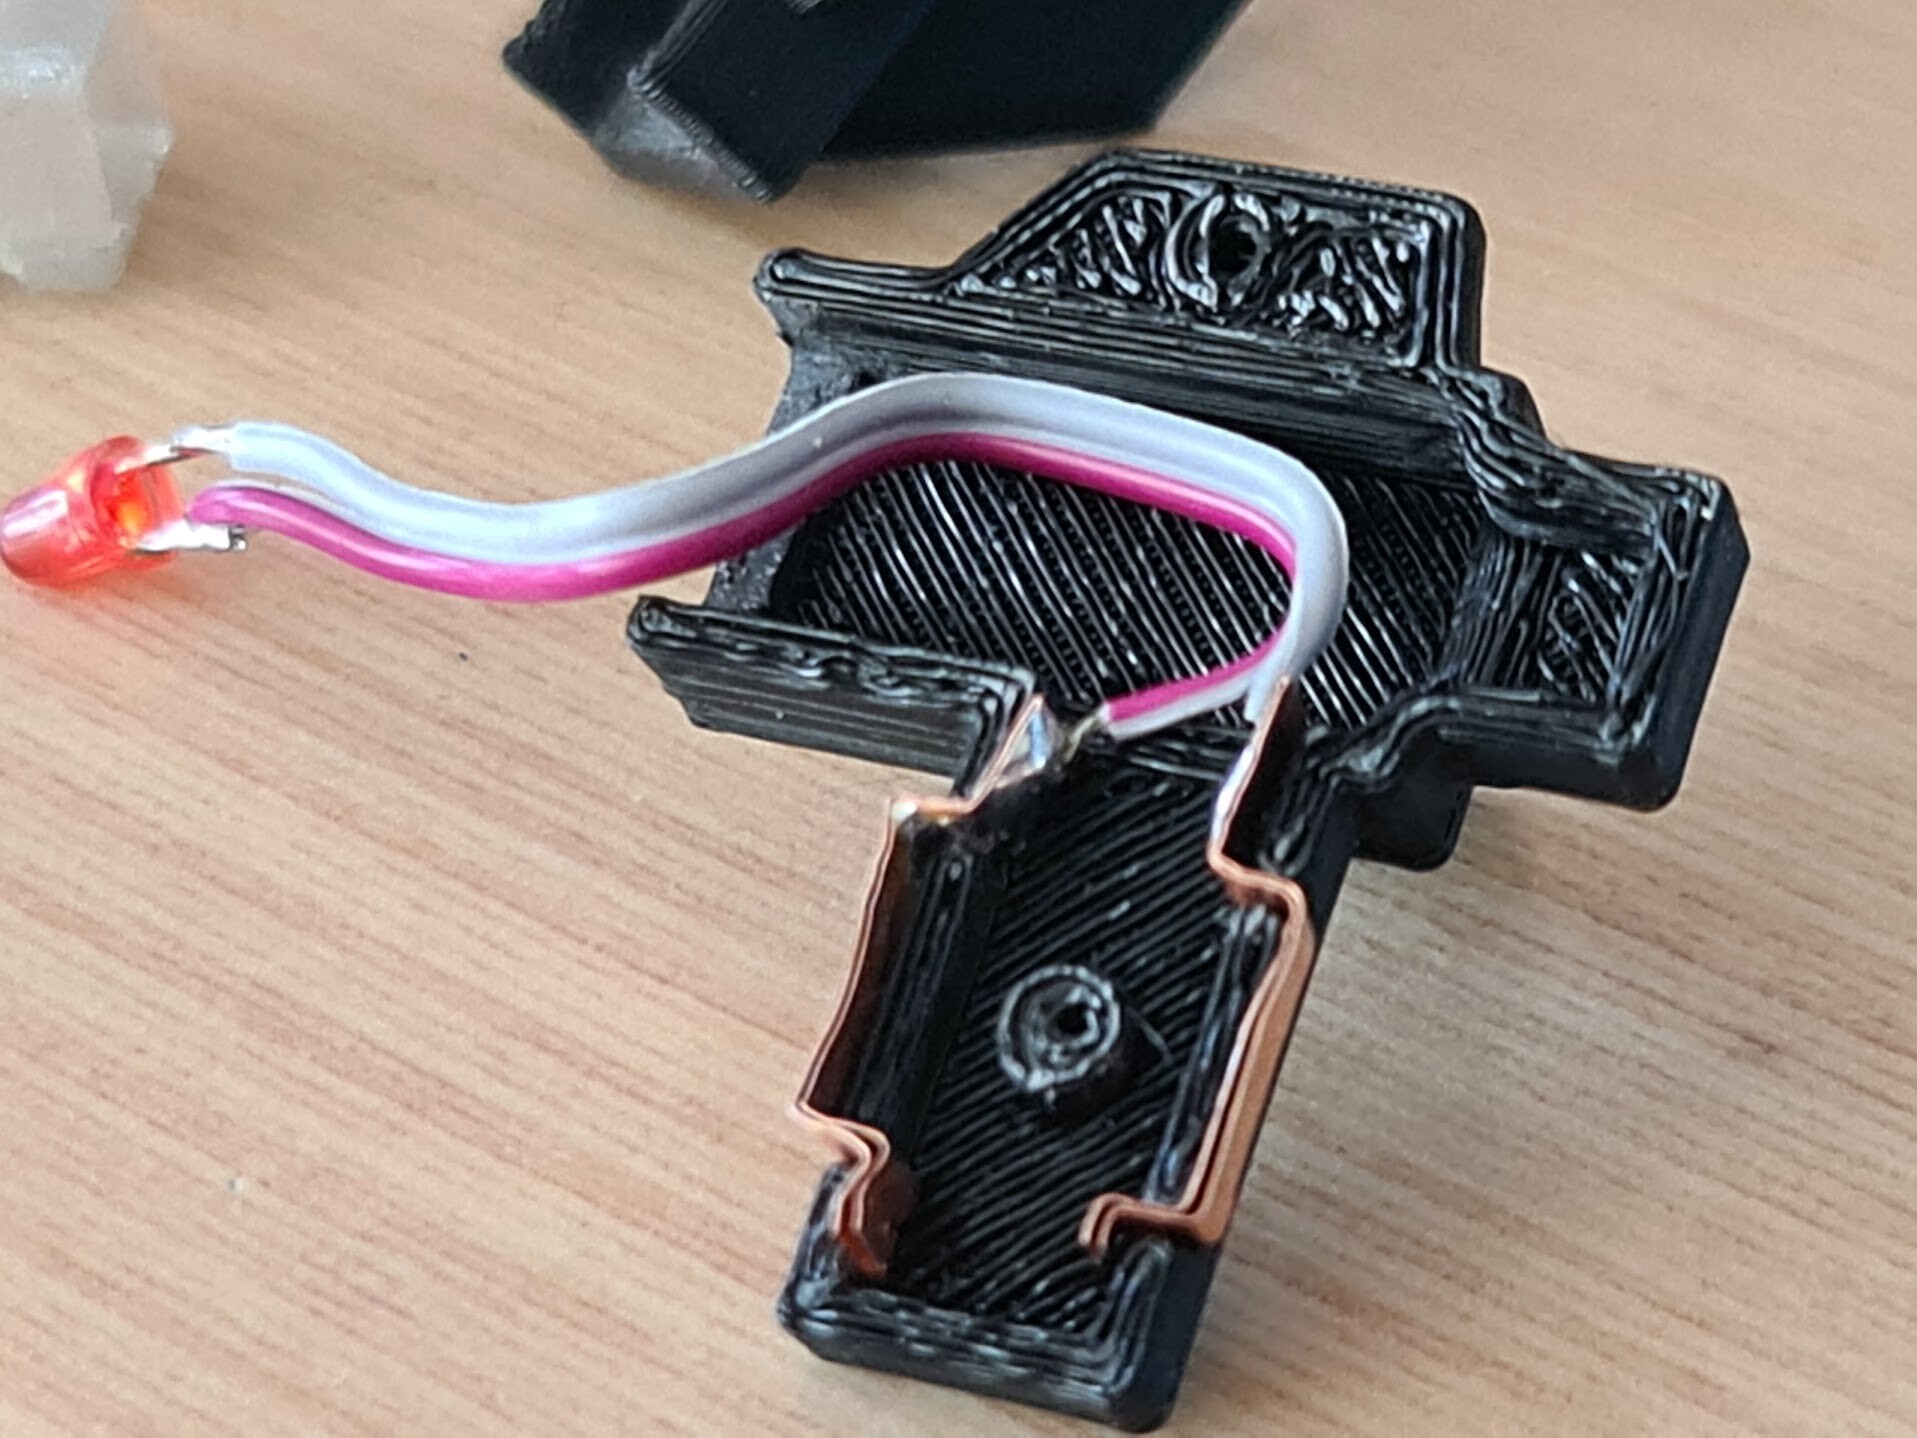
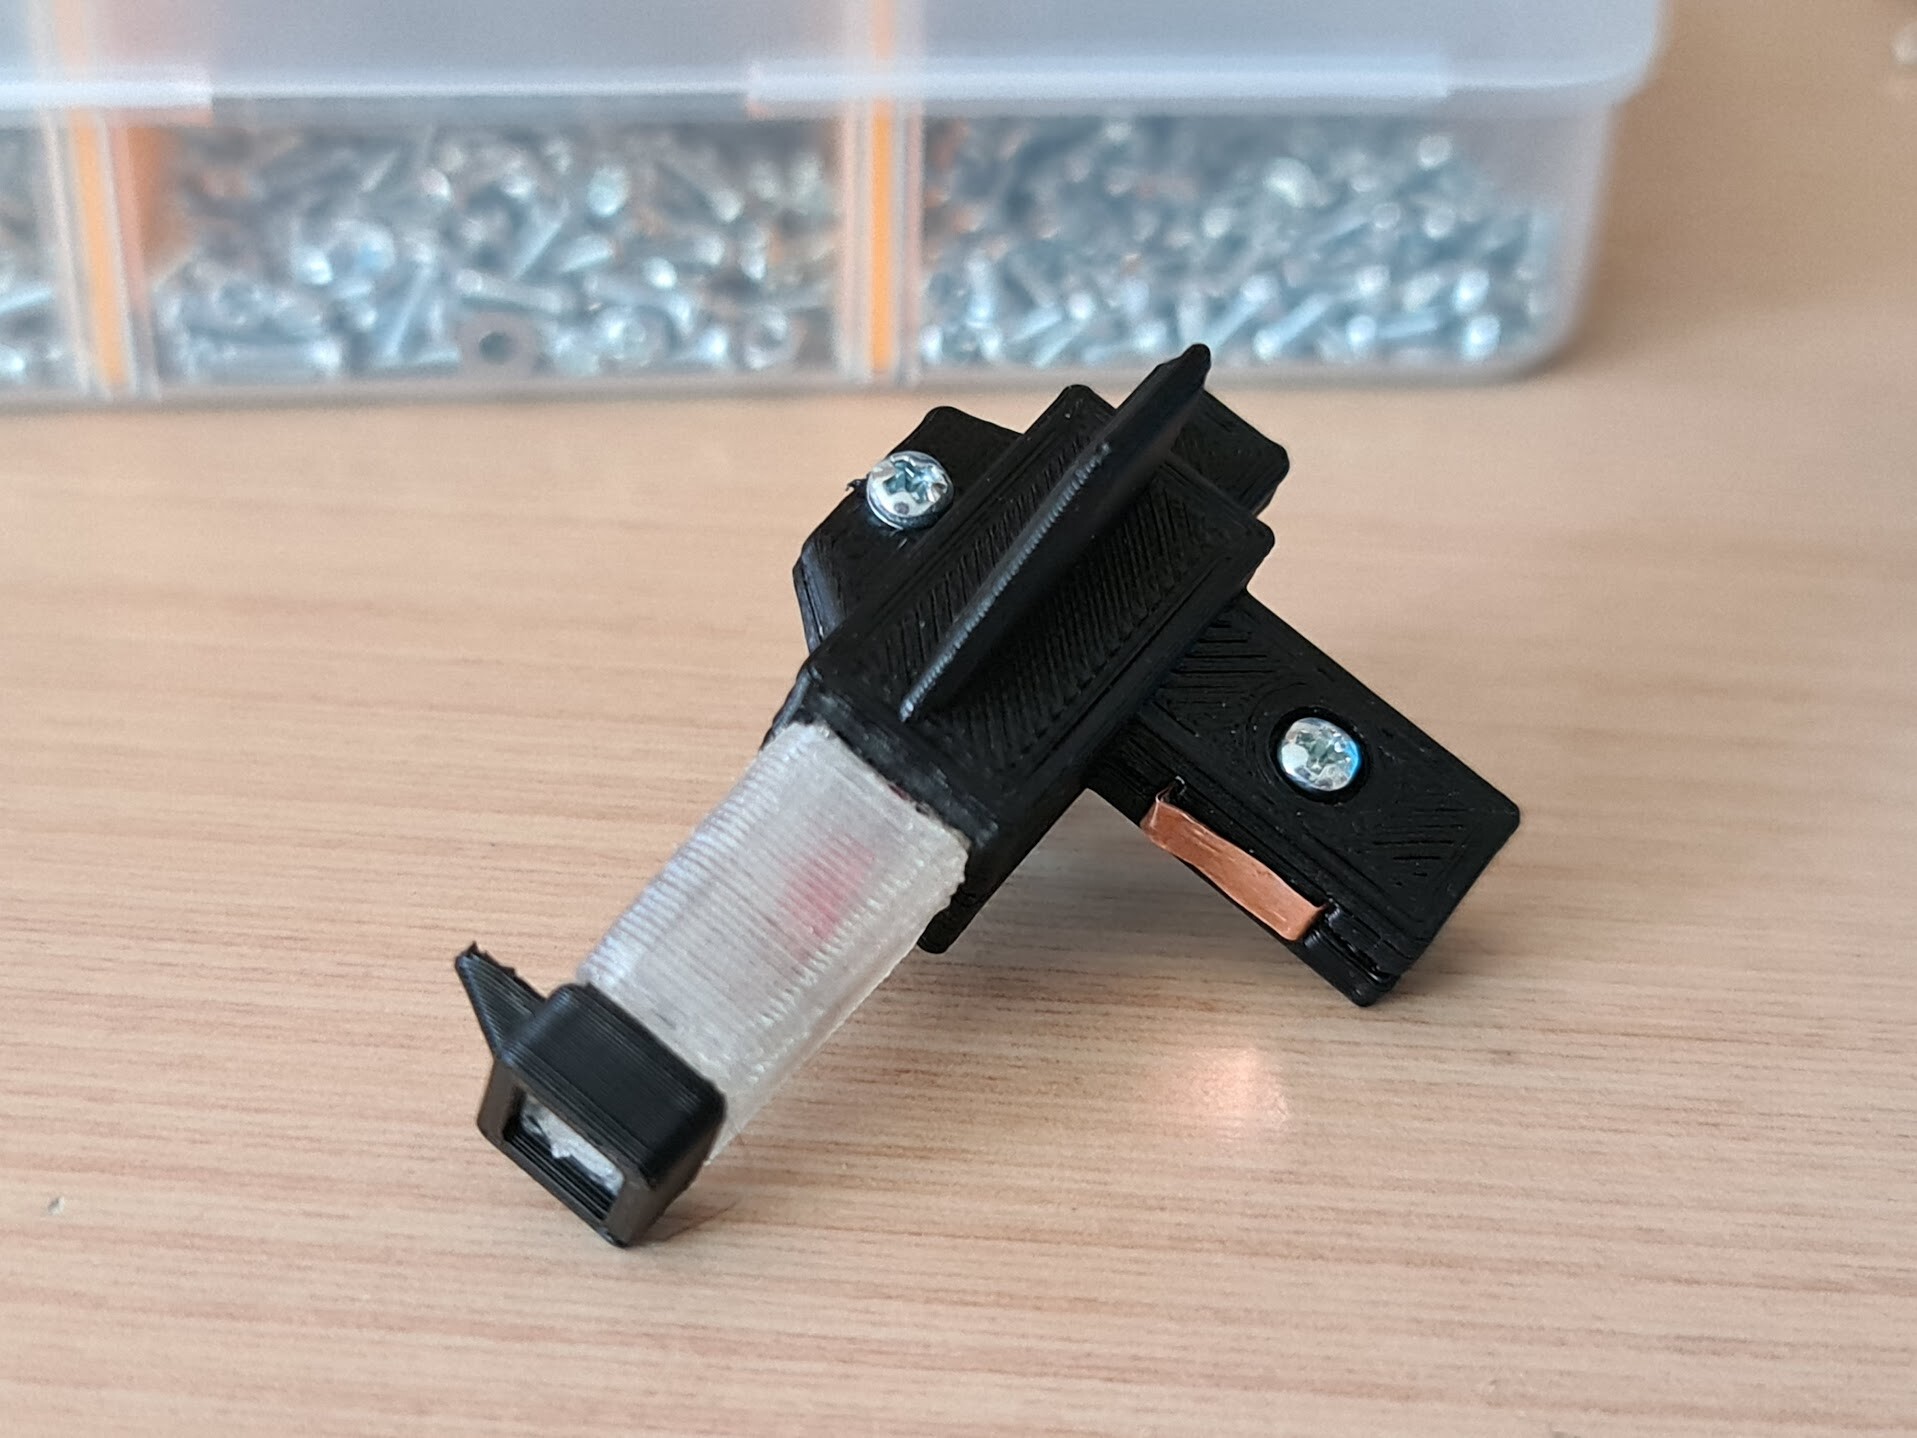
For the red translucent part, I printed it with a white translucent part because I don't have red tinted translucent filament. Instead of it, I used red LED inside.

I used copper sheet once again for the connection areas to lit the gun. I thought form factor was challenging for a 3d printed case of that gun but I even had space left inside :)

Black screws would be better. Don't have any :(
Take cover!
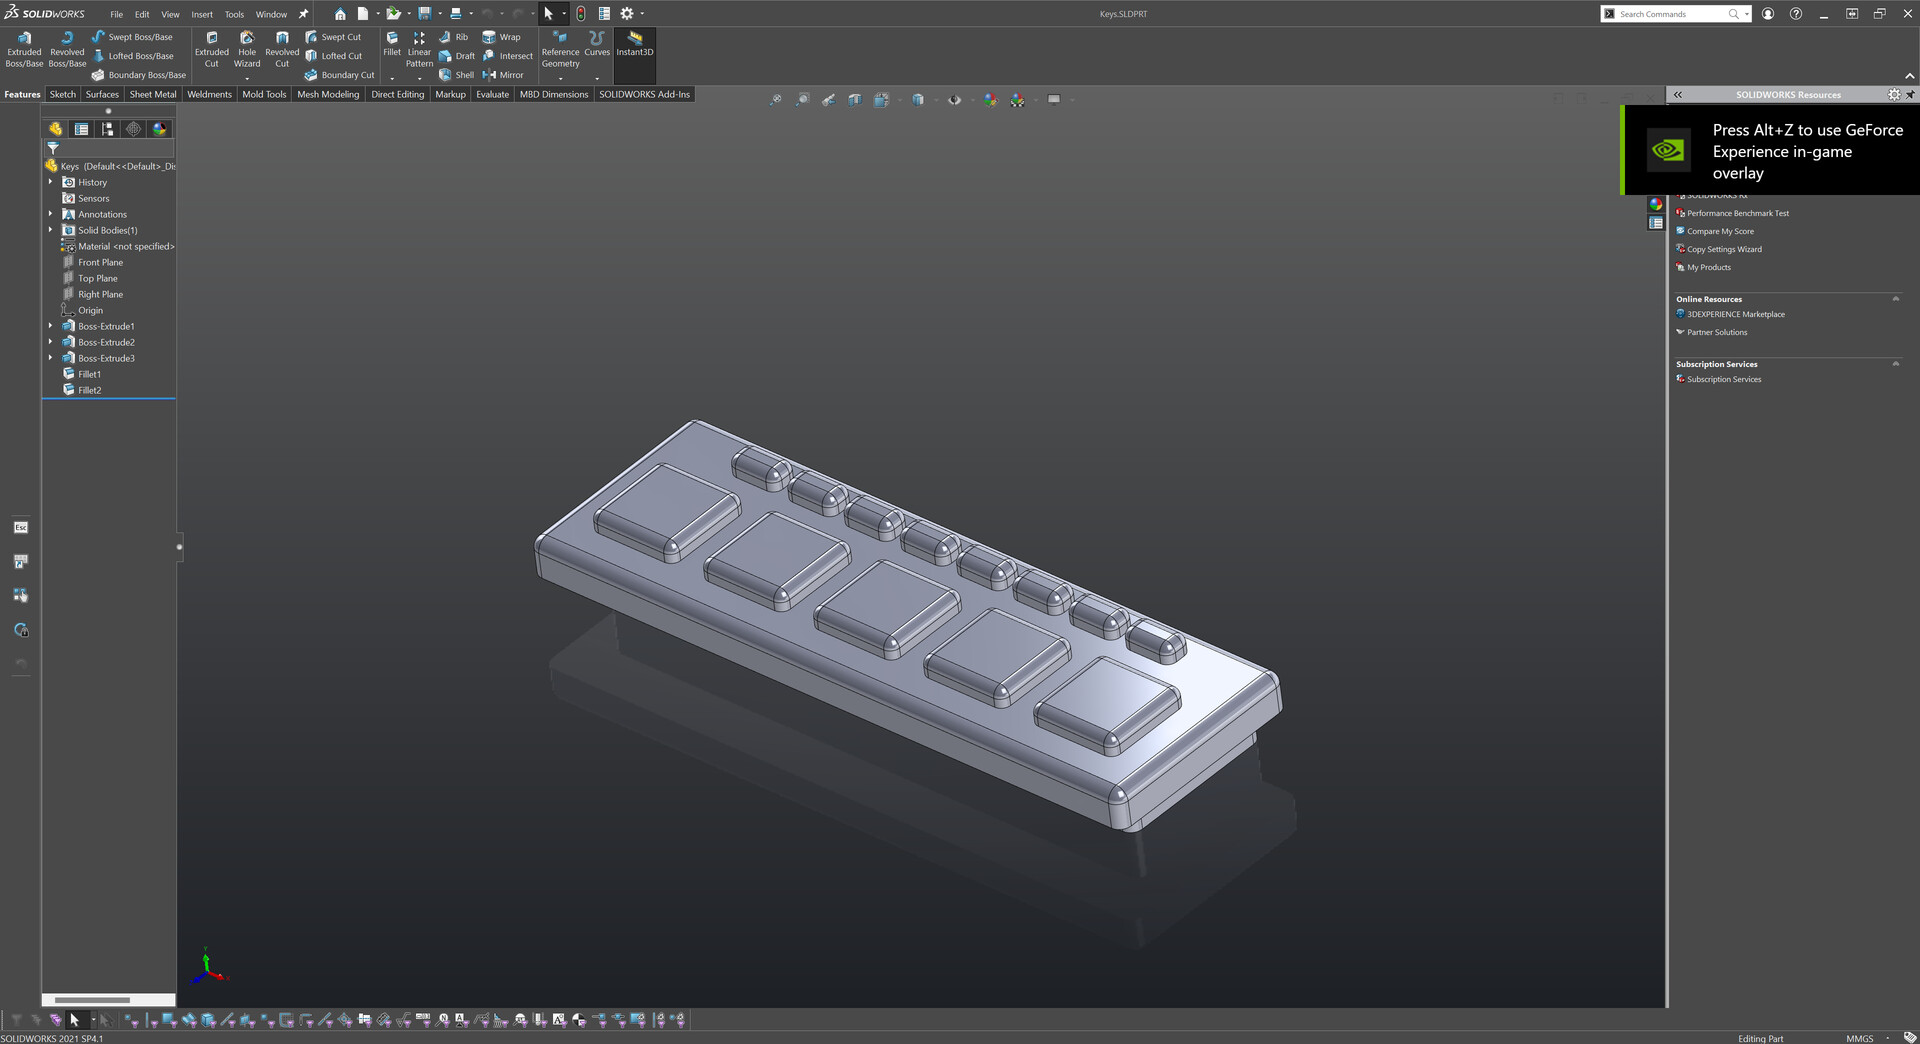
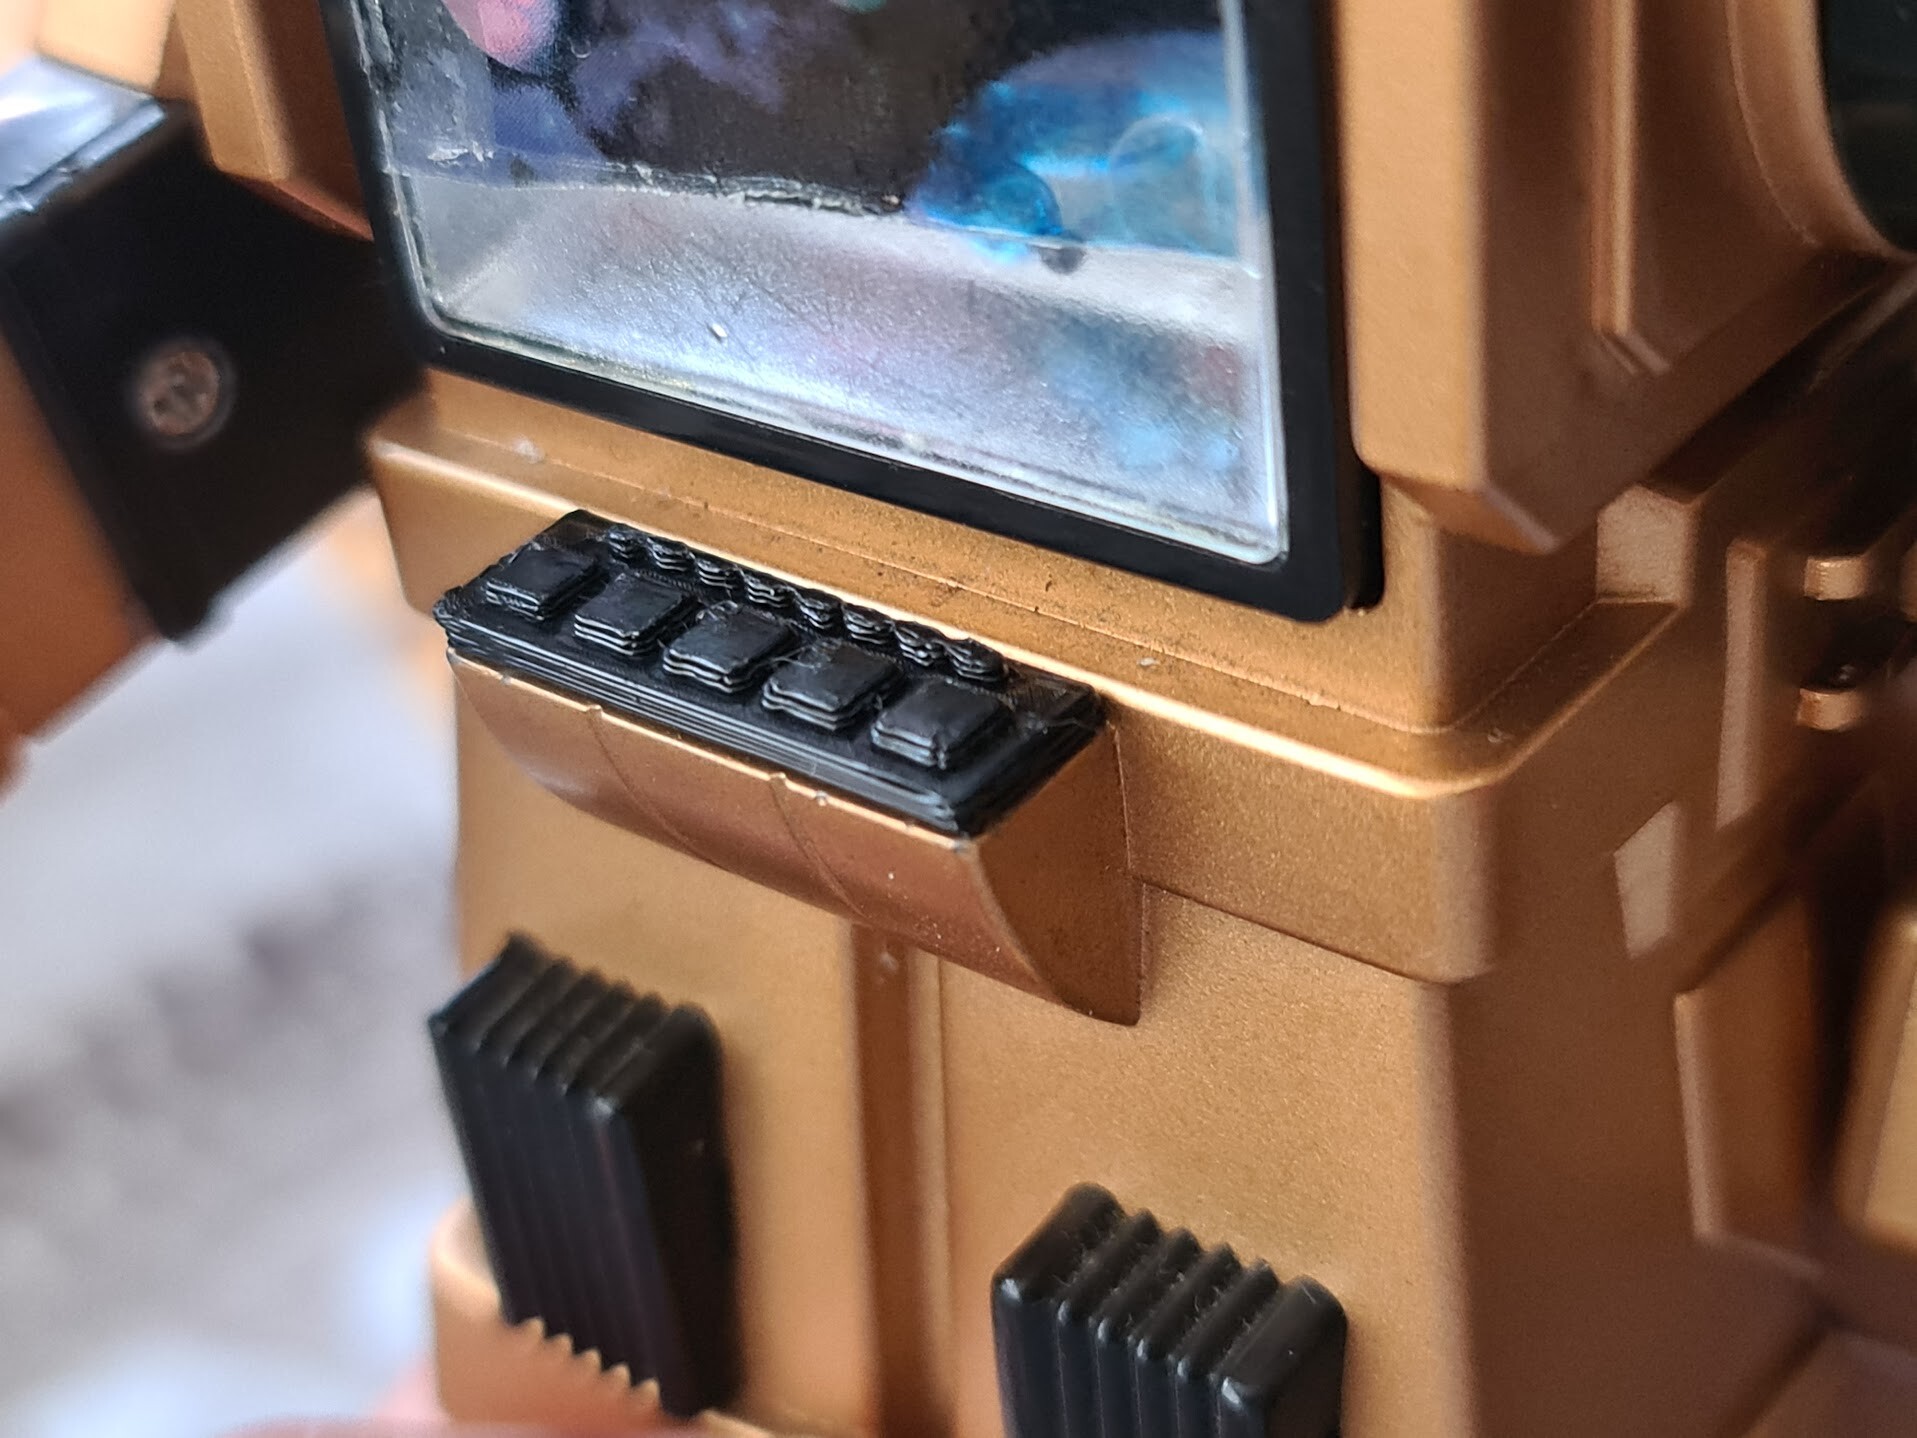
For the last missing part, I checked the photos I gathered by google to model the keyboard part in front of the screen. this was the easiest part.
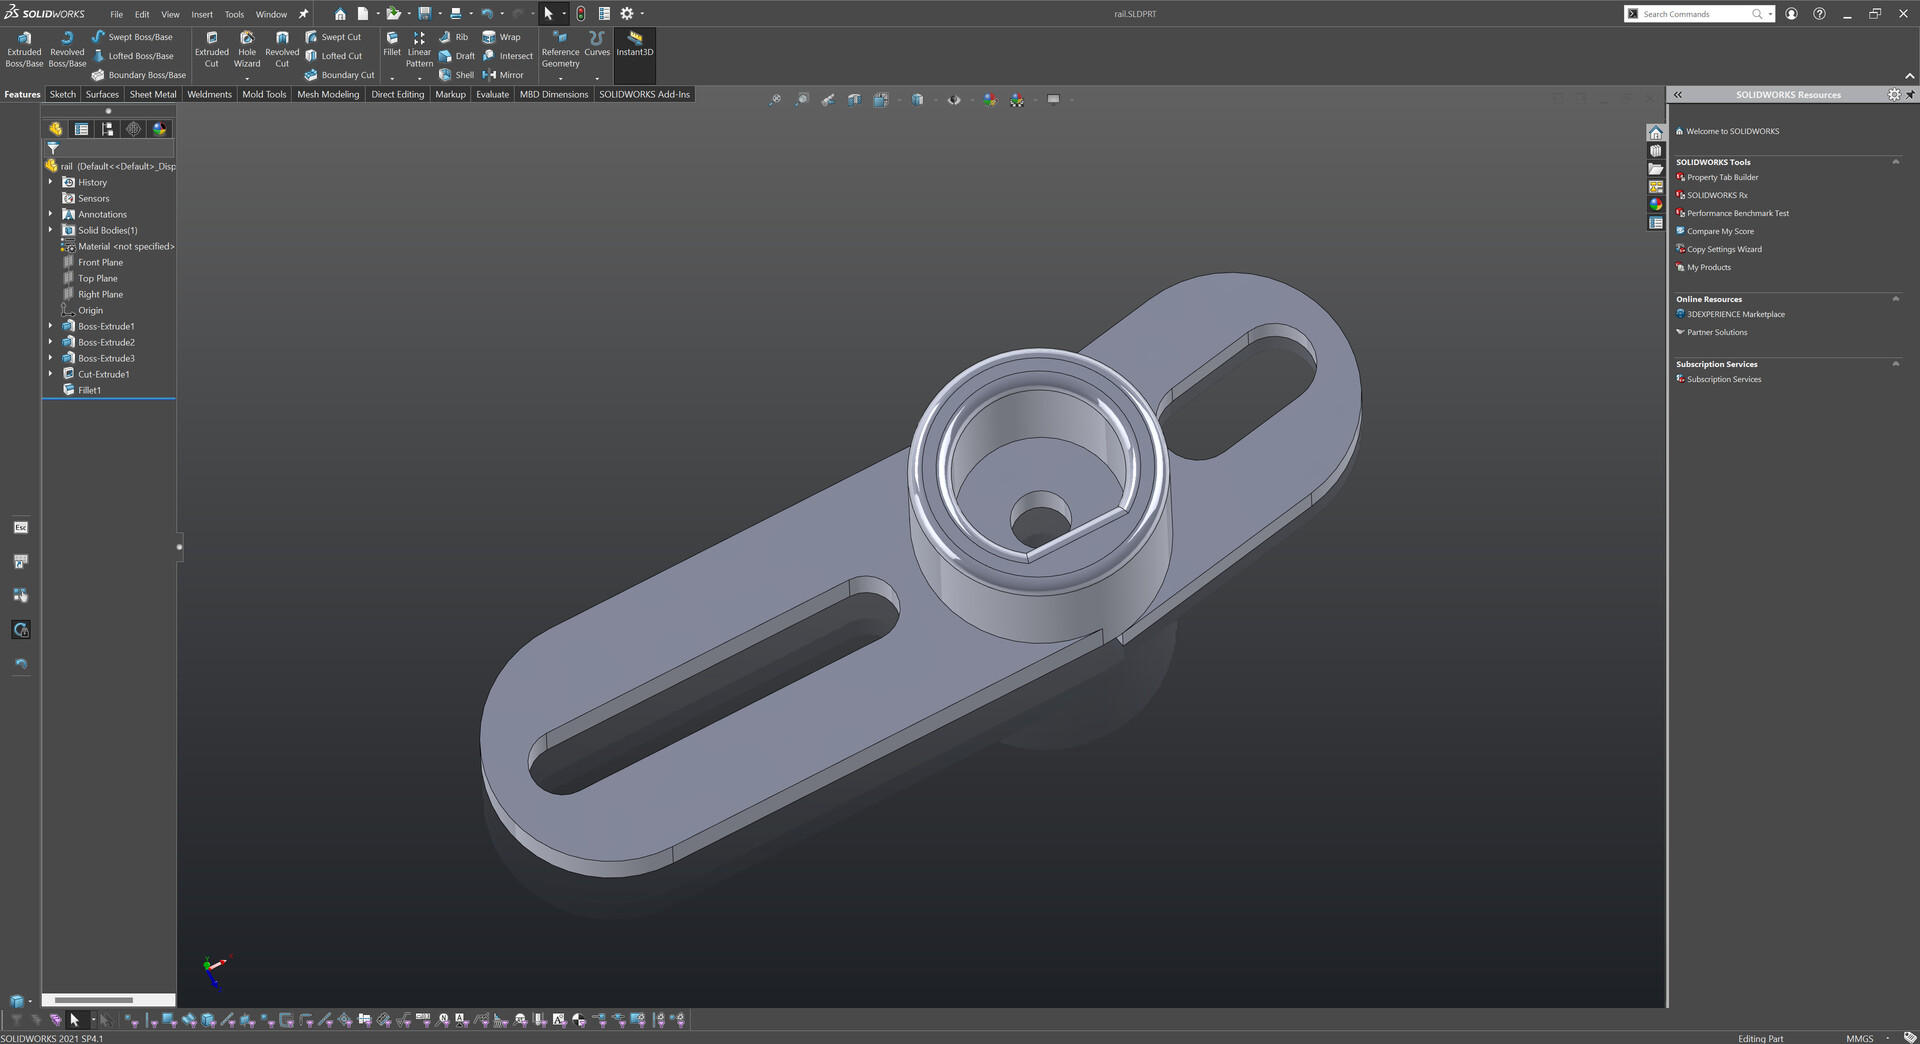
And as a one final replacement, I remodeled a rail part that connects head and the right arm to move accordingly. Because the existing part was breaking too much.

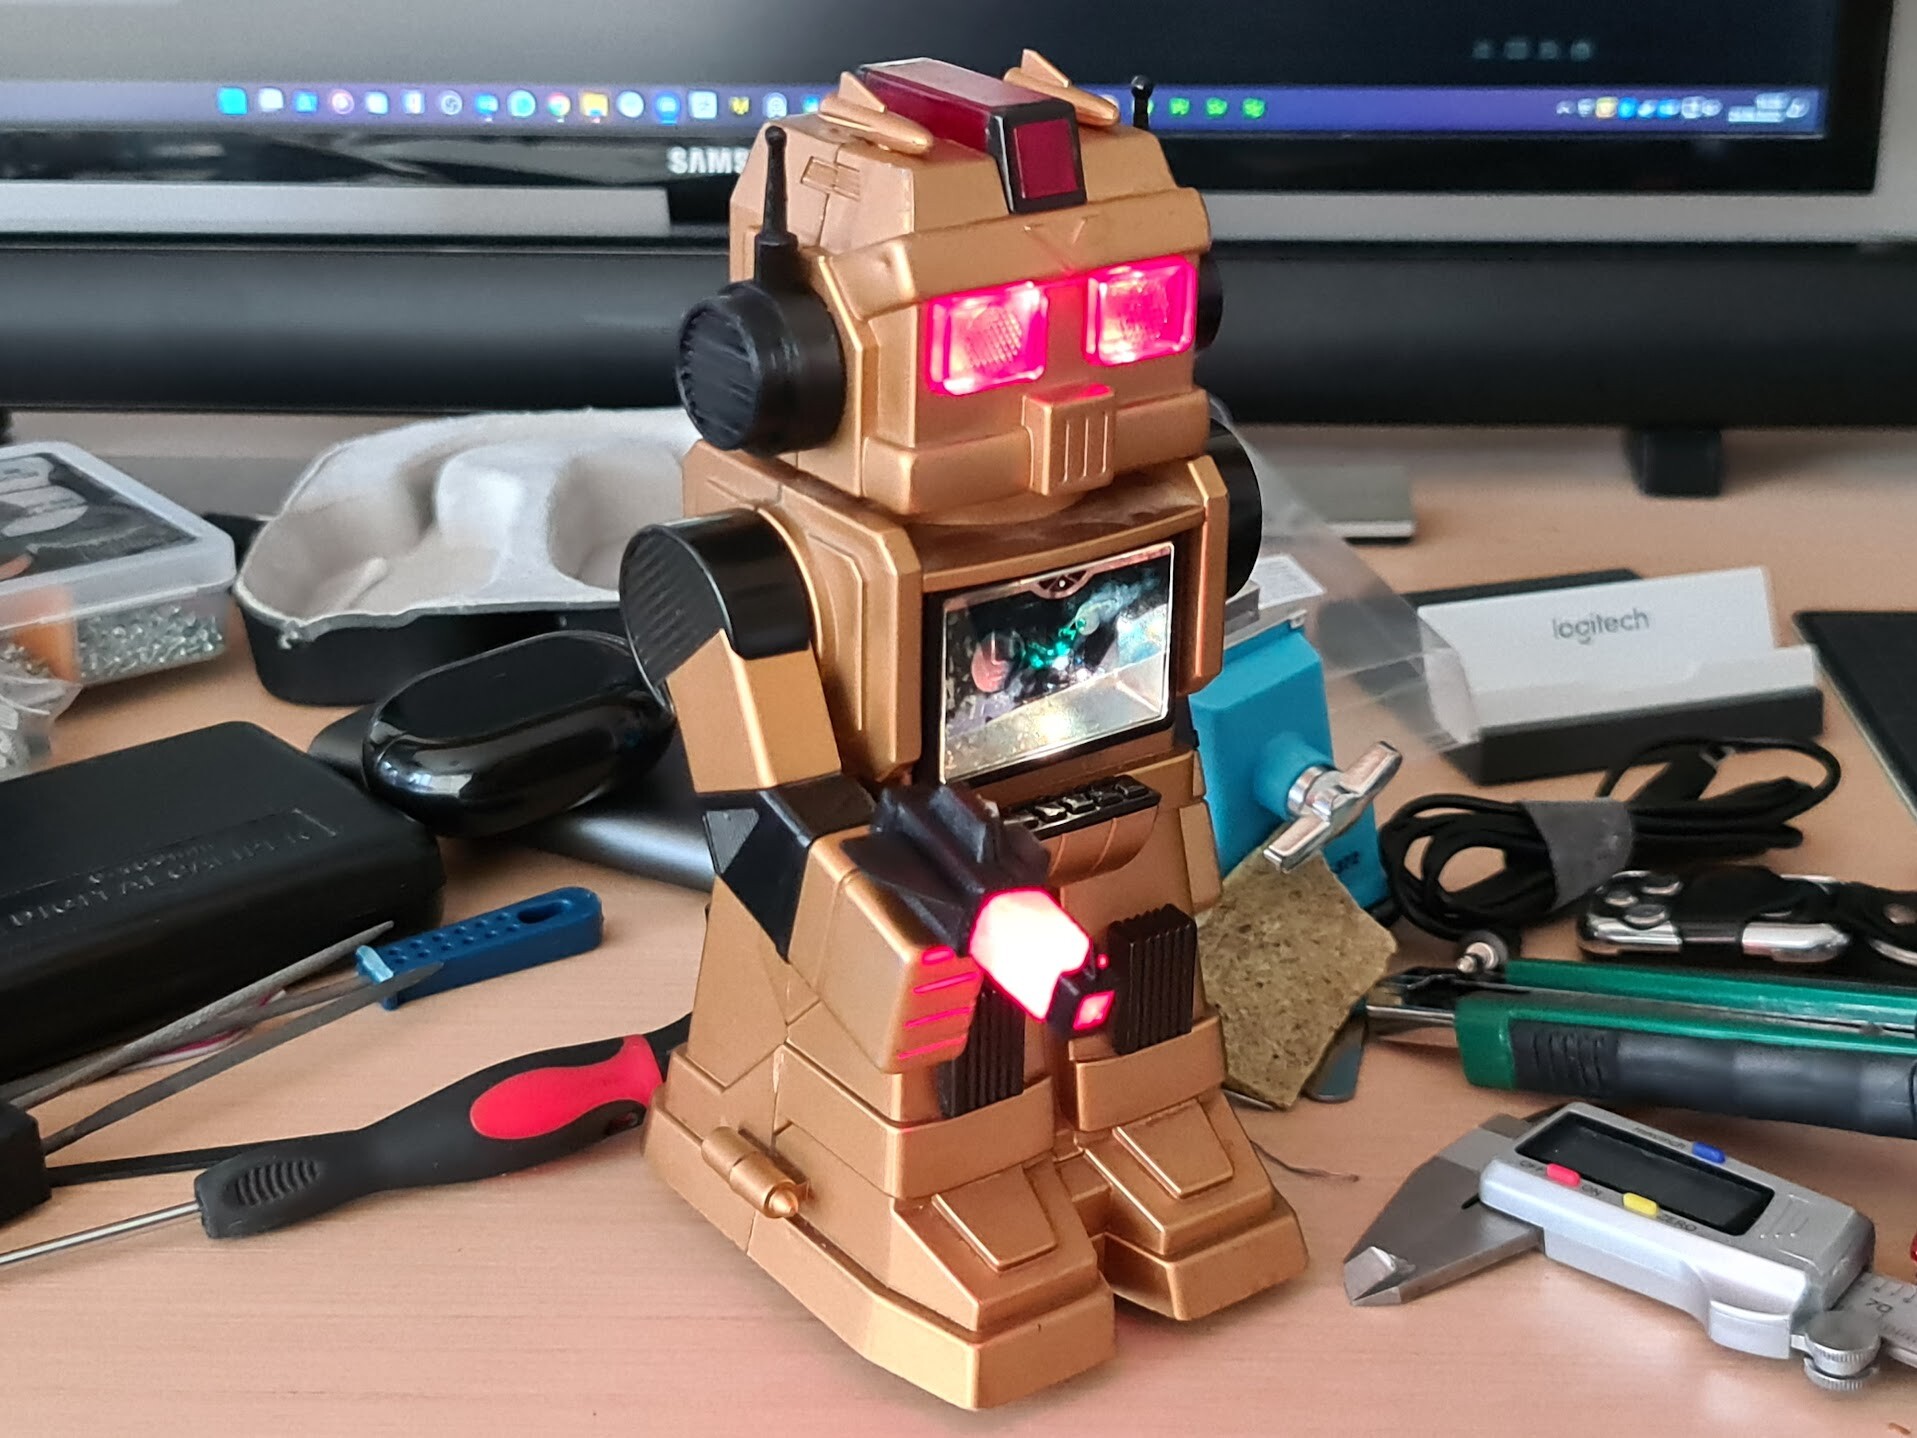
And the robot is completed as it was, back in 80s.

I'm sure there are some mechanical problems in the engine box, but I couldn't dare to open it yet, maybe next time. Meanwhile I will be looking for a solution for the ripped of transparent sticker on the screen. I hope you like this lazy replacement process, and have a good weekend :)
P.S. I can't believe I modeled this robot "that similar" by looking to the photos I gathered from the internet 3 years ago.